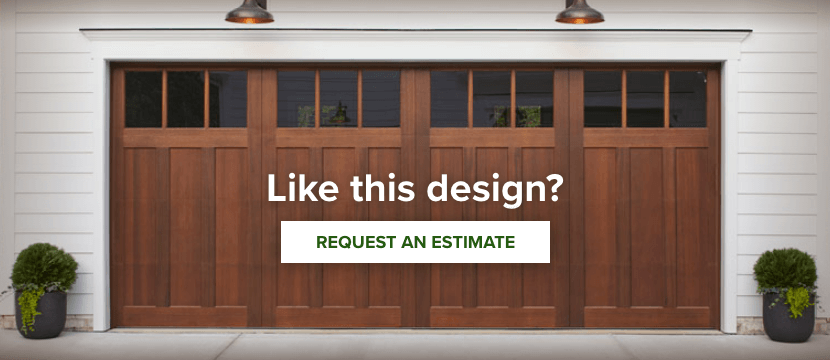
Spring Garage Door Maintenance: Professional Checklist After Winter’s Toll
Spring has arrived in Pennsylvania, bringing the annual urge to refresh your home. You’re ready to tackle yard work, clean gutters and check your HVAC system. But there’s one critical home maintenance task that often gets overlooked: your garage door.
Your garage door is your home’s largest moving appliance, and it just endured months of harsh winter conditions. Ice buildup, road salt and freezing temperatures took their toll on springs, cables and rollers. Winter weather causes wear and tear that’s worth addressing to keep your door running smoothly and safely.
A thorough inspection helps you catch small issues early and keep your garage door performing reliably all year. Use this checklist to learn how to maintain your garage door after winter’s wear and tear, help you spot areas that need attention and determine when to call an expert.
Why Your Garage Door Needs a Post-Winter Checkup
Winter is tough on garage doors. Between December and March, your door faces environmental stressors that can affect its performance and longevity.
Road salt contributes to corrosion on metal components like springs, hinges and tracks. Freeze-thaw cycles weaken metal parts through repeated expansion and contraction. Moisture can work into seals and weatherstripping, which may lead to rust. Debris accumulates in tracks, making rollers work harder with every cycle.
A spring checkup is a smart preventive measure that delivers three major benefits for garage door upkeep:
- Extend its lifespan: Addressing corrosion and wear early helps you avoid premature replacement of expensive components.
- Spot potential issues early: A visual inspection reveals areas that need attention before they affect daily operation.
- Prevent functionality issues: Proper seasonal garage door maintenance keeps your door operating smoothly and quietly.
The best way to stay ahead of these issues is with a professional maintenance plan tailored to your door’s needs.
Timeline for Spring Garage Door Maintenance
The ideal timing for your spring garage door maintenance is within 30 days of warmer weather arriving. This window allows you to address winter-related damage before increased spring and summer activity places additional strain on your system.
Why the 30-day window matters: Winter damage compounds over time. A small rust spot can spread. A slightly worn cable can fray further. A minor spring weakness can escalate. Addressing issues within 30 days prevents small problems from becoming expensive repairs.
Mark your calendar for mid-March to early April to schedule your comprehensive spring inspection. This timing gives you the full benefit of preventive maintenance before garage door use increases with warmer weather.
The Ultimate Spring Garage Door Maintenance Checklist
A comprehensive checklist is a key part of a responsible homeowner’s seasonal upkeep routine. Just like your roof or HVAC system, your garage door benefits from seasonal attention.
Maintaining your garage door starts with knowing what to inspect and when to take action. Regular maintenance keeps your system reliable year-round.
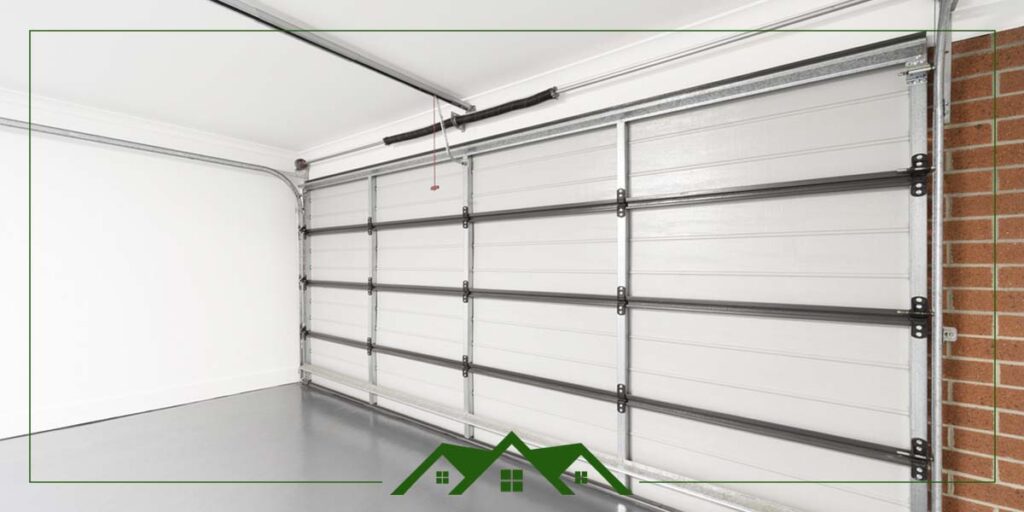
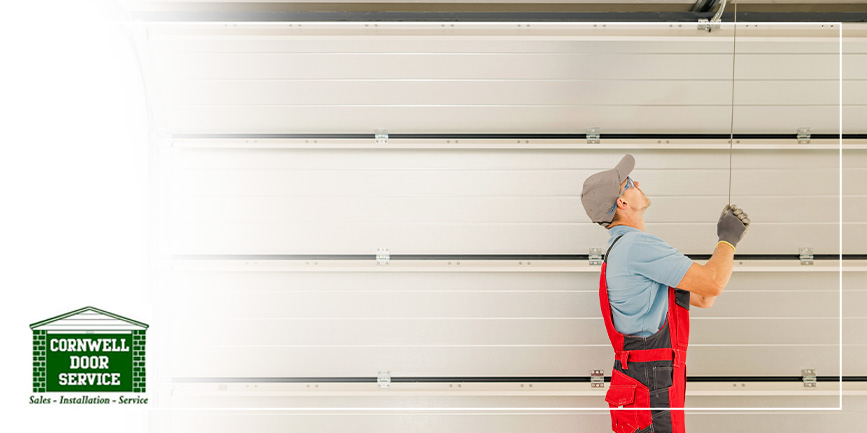
1. Start With a Thorough Visual Inspection
Start your garage door spring maintenance by examining all critical components for signs of wear. A careful visual inspection helps you identify problems before they escalate:
What to Check When Inspecting Garage Door Springs
When inspecting garage door springs, check for these critical signs of wear:
- Gaps in coils (indicates signs of breakage)
- Rust or corrosion on the metal surface
- Visible stretching or sagging of the spring
- Spring mounting brackets are secure and properly fastened
Important: If you spot any of these issues, call a professional immediately. Spring repair requires specialized knowledge and tools for safety.
- Cables: Check for fraying, kinks or broken strands.
- Rollers: Inspect for cracks, worn edges or wobbling during operation.
- Tracks: Look for dents, misalignment or debris buildup.
- Hardware: Check that all bolts and brackets are tight and secure.
Safety Features Testing
Your garage door includes several critical safety mechanisms that protect you and your family. Spring maintenance is the perfect time to verify these systems are functioning properly.
Auto-Reverse Mechanism Test
The auto-reverse safety feature stops and reverses your door if it encounters an obstruction while closing. This prevents entrapment injuries and property damage.
- Open the garage door fully using the opener
- Place a 2×4 block of wood on the floor directly in the door’s path
- Close the door using the opener remote or button
- The door should stop immediately when it contacts the wood and reverse back up
- If the door doesn’t reverse, contact a professional immediately
Photo Eye (Sensor) Test
Photo eye sensors create an invisible beam across the bottom of your door opening. If anything breaks this beam while the door is closing, it stops the door to prevent accidents.
- Open the door fully
- With the door closing, wave your hand in front of the photo eye sensor (usually 6 inches above the floor)
- The door should stop immediately when you break the beam
- If the door doesn’t respond, the sensor lens may need cleaning or the sensor may need professional service
These safety tests should be performed at least twice yearly, particularly at the beginning of spring. They’re simple to do but absolutely critical for preventing accidents.
When to Call a Professional Technician
While many maintenance tasks are homeowner-friendly, certain situations require professional expertise and specialized tools. Don’t hesitate to call if you spot any of these issues:
- Springs showing gaps in coils or visible stretching (indicates breakage)
- Frayed or broken cables
- Excessive rust on metal components
- Door moving unevenly or dragging to one side
- Loud grinding, squealing, or popping noises
- Safety reversing mechanism not functioning
- Springs pulling away from mounting brackets
- Any damage from winter storms or accidents
Important: Spring and cable replacement should never be DIY projects. These components are under extreme tension and can cause serious injury if mishandled. Professional technicians have the proper equipment and safety training to perform these critical repairs safely.
The Cost of Skipping Spring Maintenance
Deferred maintenance on garage doors leads to compounding problems and significantly higher repair costs. What starts as minor wear becomes major structural damage when ignored.
Common Expensive Repairs Resulting From Skipped Maintenance
- Spring replacement: $300-$600 per spring (most systems have 2 springs, so $600-$1,200 total)
- Cable and pulley replacement: $200-$400
- Panel replacement: $500-$1,500+ (from unbalanced door operation causing damage)
- Motor/opener replacement: $800-$2,000 (from overwork due to worn parts)
- Emergency service calls: Often charged at 25-50% premium over regular pricing
- Full door replacement: $2,500-$5,000+ (when damage is extensive)
The Math On Preventive Maintenance
A single annual maintenance visit costs $150-$300. A single major repair from deferred maintenance costs $500-$2,000+. The ROI is obvious: annual preventive maintenance saves thousands.
Consider this scenario: A homeowner skips maintenance for 3 years to save $450-$900 in annual visits. When springs finally fail, they pay $1,200 for emergency replacement plus potential additional damage. They would have saved $300-$600 by doing annual maintenance.
Regular spring and component maintenance is one of the highest-ROI home maintenance investments you can make. A small annual investment prevents major expenses down the road.
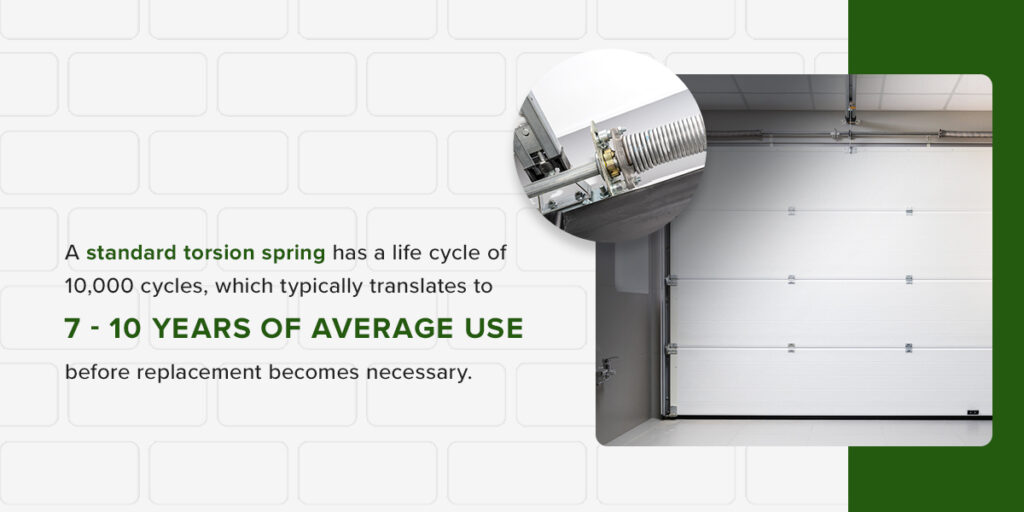
Spring fatigue is a common wear pattern for garage doors. A standard torsion spring has a life cycle of 10,000 cycles, which typically translates to seven to 10 years of average use before replacement becomes necessary. Regular garage door spring maintenance helps you catch wear before it leads to failure.
2. Clean the Door, Tracks and Sensors
Cleaning removes corrosive salt, grime and debris that accumulated over winter. You’ll need mild dish soap, water, a soft cloth and a soft-bristle brush.
Start with a gentle hose rinse from top to bottom. Avoid high-pressure washers, bleach or abrasive cleaners, as they can damage the finish, seals or paint. Wash the panels with soapy water, then rinse thoroughly to remove soap residue.
Once the door panels are clean, focus on the tracks, rollers and sensors:
- Tracks: Remove visible debris with your hands or a brush. Wipe down surfaces with a damp cloth to eliminate salt residue.
- Rollers: Clean the rollers by rotating them and wiping away buildup that can cause friction and noise.
- Sensors: Wipe the lenses with a soft cloth to remove dust and dirt. Remove any obstructions from the sensor path and check that both sensors are aligned properly.
Our seven-point garage door sensor maintenance checklist provides additional guidance for keeping sensors in optimal condition.
3. How to Lubricate a Garage Door
Apply silicone-based or lithium spray lubricant to hinges, rollers, springs, and bearings. Do not lubricate tracks (causes slipping). Wipe away excess.
- Select silicone spray or white lithium lubricant
- Apply to moving parts: hinges, rollers, springs, and bearings
- Skip the tracks entirely (causes slipping and dirt accumulation)
- Wipe away excess lubricant with a clean cloth
If lubrication doesn’t resolve grinding or squeaking sounds, professional garage door noise reduction services can help identify the underlying cause.
4. How to Test Garage Door Balance
- Close the door fully
- Pull the red release cord down (disconnects trolley from opener carriage)
- Verify the door lifts manually without resistance
- Lift the door halfway and release it
- Observe if the door holds its position (balanced) or falls/rises (needs adjustment)
- If door falls or rises, spring tension needs professional adjustment
5. Check the Safety Features
Your garage door’s safety features help protect people and property, and federal law and industry safety standards require them to prevent injuries and accidents.
Test the auto-reverse mechanism by placing a two-by-four or similar object in the door’s path, then close the door using the opener. When the door contacts the object, it should immediately reverse direction. If it hesitates or doesn’t reverse, the force settings need professional adjustment.
Next, test the photo-eye sensors. Open the door fully, then press the close button. While the door is descending, wave an object through the sensor beam near the floor. The door should reverse immediately when the beam is interrupted.
If either safety feature fails these tests, your door needs attention right away. It may be a good opportunity to upgrade to a modern garage door opener with enhanced safety technology. When choosing an opener, look for features like battery backup and smartphone connectivity. Proper sensor alignment is essential for reliable safety feature performance.
When to Call a Professional
While DIY inspections are valuable for garage door upkeep, knowing your limits is essential for safety. Some maintenance tasks are straightforward, while others require specialized training and equipment.
Understanding the difference helps you protect your family and keep your door system in excellent working order.
DIY-Friendly Maintenance Tasks
These basic maintenance activities are safe for most homeowners to handle on their own:
- Cleaning door panels, tracks and sensors
- Lubricating hinges, rollers and springs
- Testing auto-reverse and photo-eye safety features
- Visual inspections for rust, wear and damage
If you need replacement parts like weather seals or new rollers, Cornwell Door can help.
Warning Signs That Require a Professional Technician
Some issues require immediate professional attention.
Call a professional if you notice these signs:
- Broken spring: A visible gap in the spring coils means the spring has snapped and needs replacement.
- Frayed cables: Cables under tension should be handled only by trained technicians.
- Failed balance test: An unbalanced door indicates spring issues that require expert adjustment.
- Failed auto-reverse test: Safety features that don’t work properly need immediate professional attention.
Garage doors are heavy systems with high-tension components. Hiring professionals for annual garage door maintenance helps ensure your system receives proper servicing from trained technicians and helps you prevent bigger problems.
If you have additional questions about servicing garage doors, our FAQ section covers many common concerns homeowners face.
Schedule Your Seasonal Garage Door Maintenance With Cornwell Door Service
A professional spring tune up gives you peace of mind, keeps your family safe and addresses minor issues before they become bigger problems. Schedule your maintenance before problems arise for worry-free garage door performance.
Cornwell Door Service provides comprehensive garage door inspections and maintenance for homeowners throughout South Central Pennsylvania. Our expert technicians will ensure your door is safe, balanced and ready for the season ahead. Schedule your post-winter inspection with our team today.
Unsure about the cost? We provide free, no-obligation estimates. Have more questions? Contact Cornwell Door Service for expert advice.
When DIY Garage Door Sensor Repairs Aren’t Enough
Successfully aligning your garage door sensors using DIY methods can help save costs on professional repairs and restore your door’s functionality. Sometimes, faulty sensors are signs of deeper problems that DIY fixes can’t solve and may even become dangerous. If you’ve tried and failed to resolve the issue yourself, this guide will help you understand the possible reasons why the problem persists and when to opt for professional garage door sensor repair.
How Do I Know If My Garage Door Sensors Are Bad?
When your garage door gives you trouble, several problems could be the cause. Before assuming that your efforts weren’t enough, confirming that the sensors are the problem is important. Here are some of the common indicators of garage door sensor problems:
- The garage door won’t close.
- You must hold down the wall button to force the door to close.
- The LED lights on the sensors are off or blinking.
- The door closes even when there’s an obstruction.
- The door reverses immediately after starting to close.
Signs Your Sensor Problem Is Beyond a DIY Fix
It can be frustrating to still face garage door problems after you’ve tried aligning your sensors and other repairs. However, it usually indicates a more significant issue that requires professional attention. Signs your sensors need more than DIY repairs include:
Sensors Won’t Work After Alignment
If your garage door sensors are not working after alignment, that’s a clear sign that DIY repairs are insufficient. In that case, you could be dealing with several issues, like:
- Loose or disconnected wires: Sensor wires can loosen or disconnect over time and, causing sensor issues. Inspect your wiring to determine if this is the cause.
- Misaligned sensor beams: Even when your sensors are aligned, a slight angle shift can disrupt the beam’s path and prevent them from communicating properly.
- Malfunctioning opener: A faulty garage door opener can interfere with the sensors’ operation even when correctly aligned.
- Sunlight interference: Sunlight can cause garage door sensors to malfunction because the sun’s strong infrared light can interfere with the sensors’ own infrared beam.
- Loose mounting brackets: The brackets holding the sensors can loosen or shift over time from garage door vibrations, causing the sensors to malfunction.
Wiring Issues
You should carefully examine the wires from the sensors to the garage door opener for breaks, fraying or corrosion. Damaged wires create an intermittent or broken electrical connection, which causes the sensors to lose power occasionally or all at once. When wiring is damaged, you’ll need professional garage door sensor repair to restore functionality.
Damaged Sensors
Another serious issue you could be facing is physical damage to the sensor itself. Sensors can degrade over time and fail to work as intended. Sometimes, your sensors can sustain damage from impact from your car, bicycle or lawnmower. The sensor can have cracks or deep scratches on the lens that can block or scatter the infrared beam, preventing the receiving sensor from getting a clear signal. No amount of alignment can fix a beam that is physically obstructed at its source.
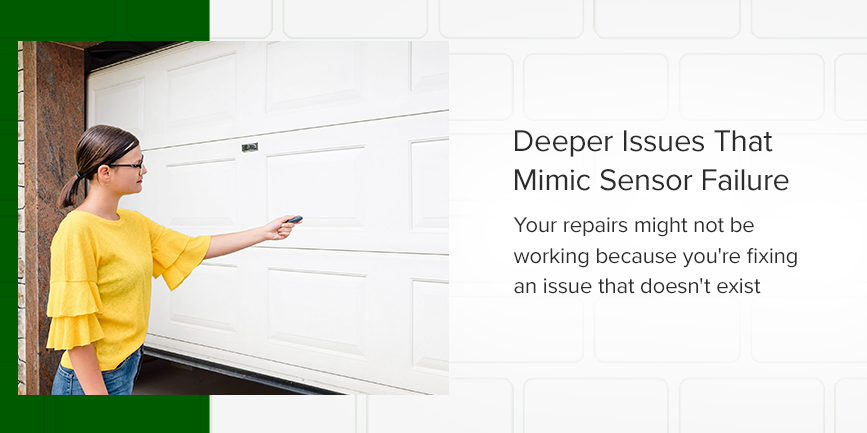
Deeper Issues That Mimic Sensor Failure
In certain instances, your repairs might not be working because you’re fixing an issue that doesn’t exist. Several garage door problems can sometimes showcase common sensor misalignment symptoms, leading to inaccurate diagnoses and ineffective solutions. Those issues include:
Faulty Logic Board
A logic board acts as the brain of a garage door system. It controls all motor functions and interprets commands from remotes, wall switches and safety sensors to make your doors open or close.
A faulty logic board may fail to power the sensor LEDs, preventing them from lighting up. It also might process sensor signals incorrectly. As a result, your garage door could showcase signs that can be mistaken for a problem with the safety sensors themselves.
Incorrect Wire Splicing
You might have a bad splice if you’ve performed previous garage door sensor repair involving wiring or the garage door wasn’t installed properly. Incorrect splicing often causes the safety sensors to fail temporarily, making the garage door stop or reverse. It can also cause blinking light error codes due to signal loss or prevent the door from closing. Because of these issues, it’s common for incorrect wire splicing to be diagnosed as sensor misalignment.
Power Supply Problems
A tripped circuit breaker, a faulty outlet or other power supply issues could be the reason your garage door sensors are not working after alignment. When your sensors fail to receive enough power, they can lose LED lights and their ability to transmit signals, causing your garage door to fail to open or close. That’s why checking your power supply is crucial whenever you have sensor problems.
The Risks of an Improper Garage Door Sensor Repair
Handling garage door sensor repairs yourself can be tempting. Unless you are an experienced technician, your repair efforts can easily go wrong. Some of the main risks of improper repair include:
- Incorrect diagnosis: The sensors might not be the real problem. If you’re untrained, you may misdiagnose the issue when the true cause could be a problem with the wiring, opener or the logic board.
- Safety hazards: Garage doors are heavy and operate under high tension. Handling these parts without proper training can lead to severe injuries, including being crushed or trapped by the door. Additionally, working with electrical components, like wiring or openers, carries a risk of electrical shock if you are not cautious or experienced.
- Further damage: Using incorrect tools or techniques can cause additional damage to wiring, hardware or the door itself. A DIY repair can even introduce new problems or complicate the existing issue.
- Expensive repairs: Poorly executed garage door sensor repair can worsen the issue and lead to damage that requires more costly fixes or replacement.
- Security vulnerabilities: If your repairs fail, you will still have a malfunctioning door, exposing your home or business to potential security threats.
Instead of risking injury or costly repairs, choose professional garage door sensor repair services to ensure safe and effective solutions.
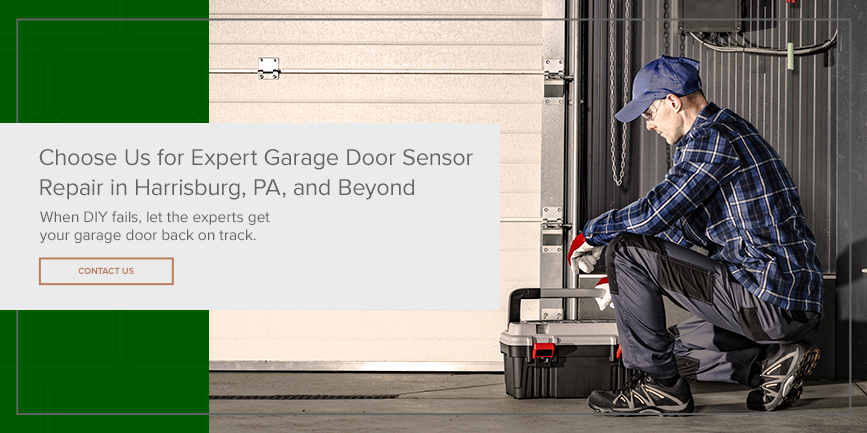
Choose Us for Expert Garage Door Sensor Repair in Harrisburg, PA, and Beyond
If your garage door sensor issues require more than basic alignment, Cornwell Door Service can help. We provide reliable garage sensor repair in Lancaster, PA, and surrounding areas. Since 1972, we’ve been dedicated to helping homeowners and businesses throughout the area maintain their garage doors’ functionality, safety and beauty.
Our highly trained technicians are skilled at accurately diagnosing and repairing garage door sensors with lasting solutions. When your DIY efforts aren’t enough, you can trust our team for professional assistance. Schedule a garage door inspection with us today, and we’ll help get your system running as intended.
Preventing Garage Door Break-Ins
Burglars don’t just look for open doors and loose windows around your house. A rapid method of entry that’s becoming more common is prying into garage doors. Whether it’s a personal home or a business warehouse, garage door security is often lacking — and people intent on stealing know it.
Do you know how to make a garage door more secure? No matter how safe your neighborhood or community might seem, everyone should how to prevent garage door break-ins and increase the security of their home. There are some tips and methods you can use to learn how to secure your garage door and keep your valuables — and your family — safe.
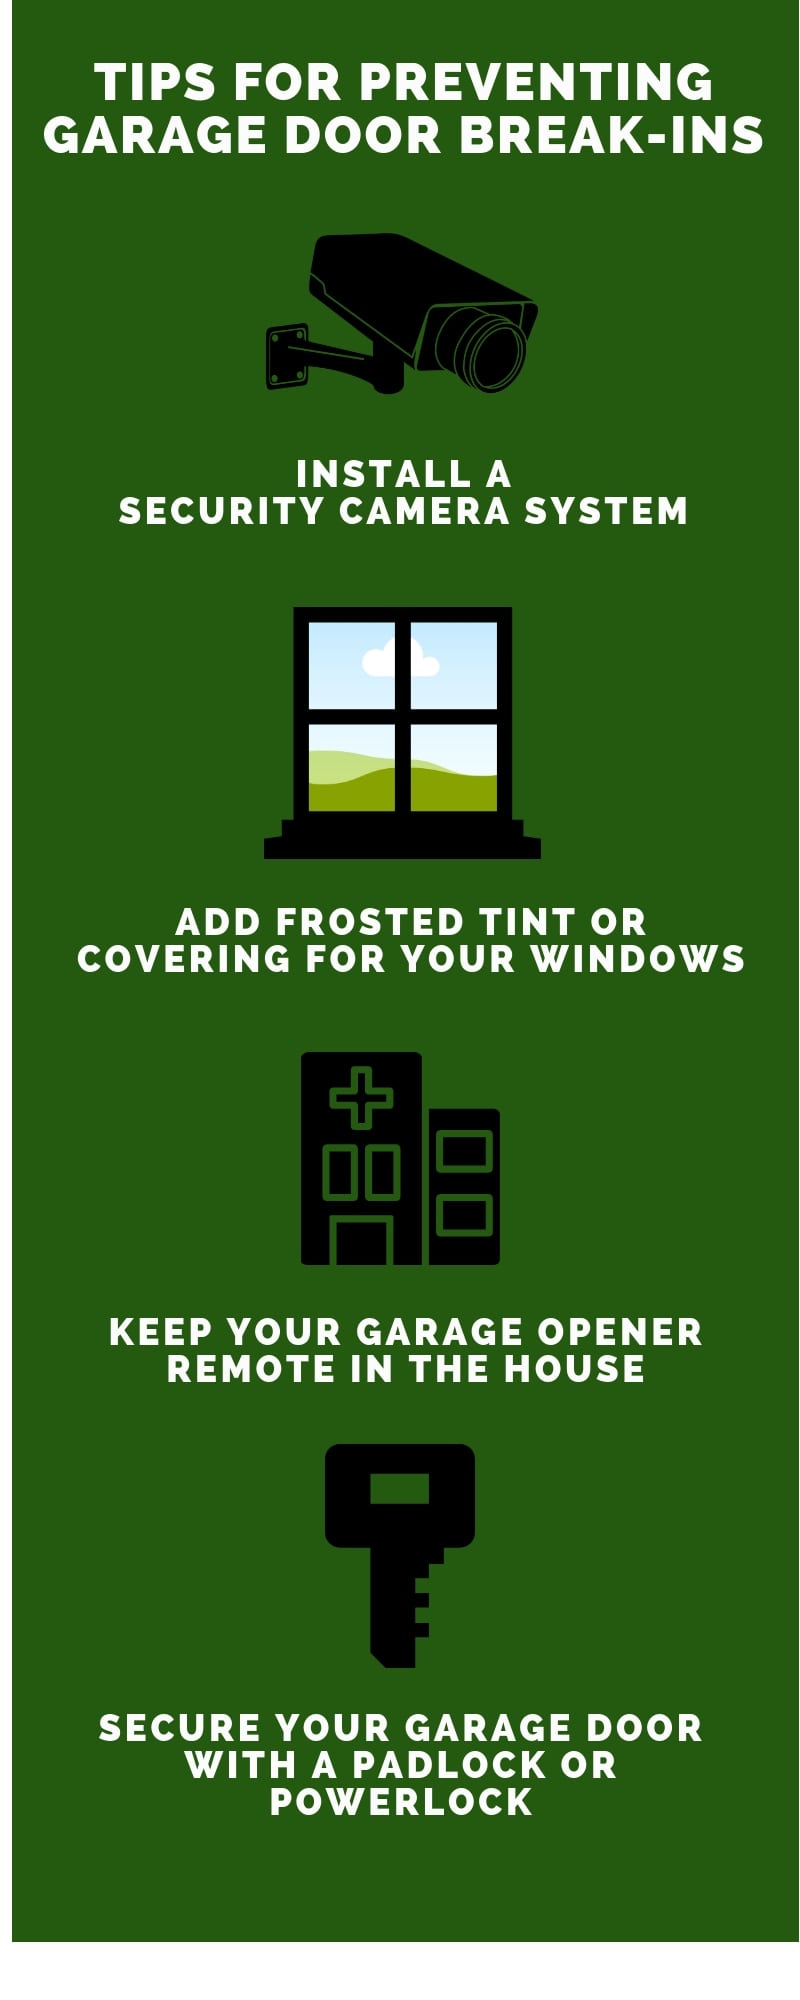
Install a Security Camera System
One of the best things you can invest in is a security system for your home or building. The presence of a visible camera will deter many people away from trespassing on your property. Installing an additional alarm can create another threshold of protection, scaring the trespasser and alerting you, your neighbors and even the police.
There are also some systems that can link to your phone, sending you notifications and real-time playback if your camera picks up any unusual activity. These types of home video streams are becoming increasingly popular for front doors, but you can also use them to prevent garage door break-ins as well!
Frosted Windows for Your Garage Door
If you want the ultimate protection for your garage, having no windows for passersby to peer into and look at what’s hiding behind your garage doors will keep your belongings secure. However, windows can provide natural lighting for inside your garage and create an aesthetically pleasing appearance that helps spruce up curb appeal of your home.
Wherever possible, add a frosted tint or covering for your windows. This will prevent burglars from sneaking a peek inside your garage, help keep your valuables out of view and deter anyone trying to be savvy by using a coat hanger to open your garage door. Frosted windows provide you with garage door security by distorting the interior view of your garage from the outside. You can even apply some coverings from the indoors, which allows you to secure a garage door from the inside.
Garage Door Opener Remote
Many people use their garage as the main entry point into their homes. To be convenient, homeowners will keep a remote garage door opener in their cars so they can open up their doors as they approach the house. But what many people tend to forget is that, if parked outside, your remote can be within clear sight of anyone looking to trespass.
Quality residential garage doors and openers today may come with security features that help keep your garage door secure. It would be much easier for a trespasser to retrieve the door opener from your car than to bust in through the garage door. By bringing your remote inside with you, you are securing your garage door an extra step by removing another access point for a potential burglar!
LiftMaster® Power Lock
Securing your garage door, especially commercial garage doors, with a padlock or power lock can give you extra protection against potential break-ins. Whether you’re using a padlock with a key or an automatic power lock like the ones LiftMaster® carries, you can keep your garage door latched to the ground when your business closes for the night or you’re away on vacation.
As a certified dealer of LiftMaster® products, Cornwell Door Service can provide you with additional information to ensure your garage door is fully secure. Visit our showroom or request an estimate today to see what we can do to help prevent garage door break-ins, or call us at 717-273-9841!