Your garage door sensors are essential in keeping everyone at your home safe. As a homeowner, you need to know what automatic garage door sensors are and how to tell if they’re misaligned. Aligning garage door sensors takes some practice, but this guide will show you exactly how to align garage door sensors whether you have a LiftMaster, Chamberlain, or other brand system. Following a step-by-step plan can streamline the process and help keep your cars and family safe.
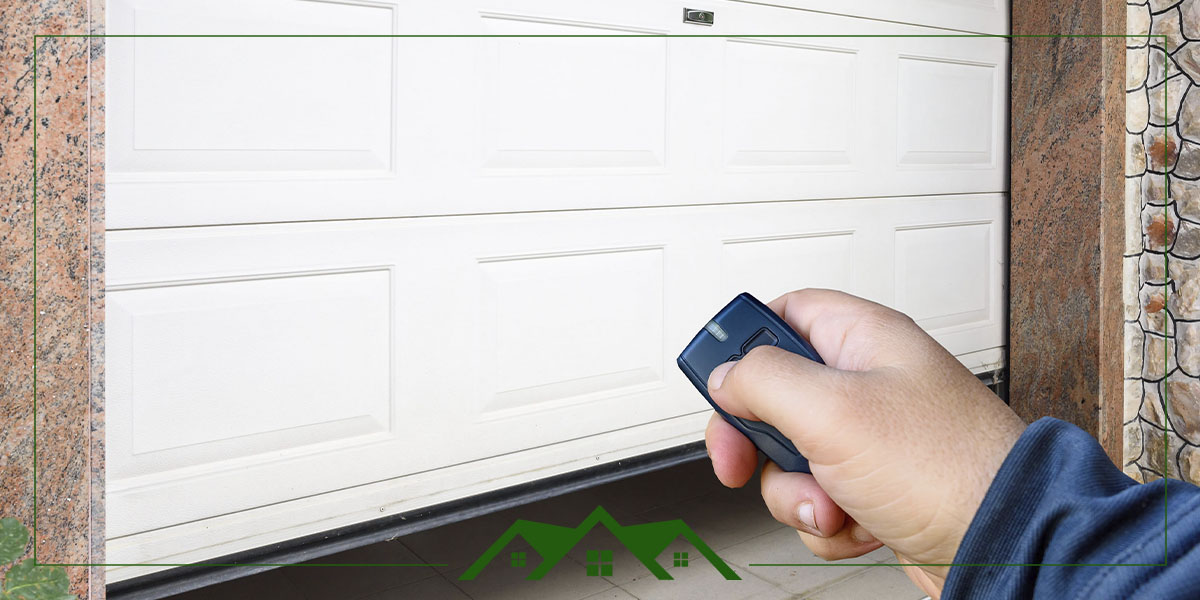
Aligning garage door sensors is a straightforward process that works across all major brands including LiftMaster, Chamberlain, Genie, and Overhead Door. If you need to realign garage door sensors that have been knocked out of position or are showing red indicator lights, follow these seven steps. This method for how to align garage door sensors LiftMaster models also applies to most other brands with minor variations.
What Are Garage Door Sensors?
Garage door sensors work by sensing if an object crosses their path. If they detect anything, such as a car, person, pet or toy, in the way as the door closes, the system reopens the door. The sensors work by using two photo-eyes, which emit an infrared line across the garage’s horizontal opening a few inches off the ground. One photo-eye transmits information, and the other photo-eye receives information.
These two sensors must work well together and should be free from fault. Properly working sensors help prevent car damage and bodily injury and are required by U.S. law.
How to Tell If Your Garage Door Sensors Are Not Aligned
Your garage door will show signs of malfunctioning when it closes and opens in unusual ways. You may also need to exit your vehicle to open and close your garage. Look for signs of door malfunctions and other indicators around the mechanical workings of your garage doors:
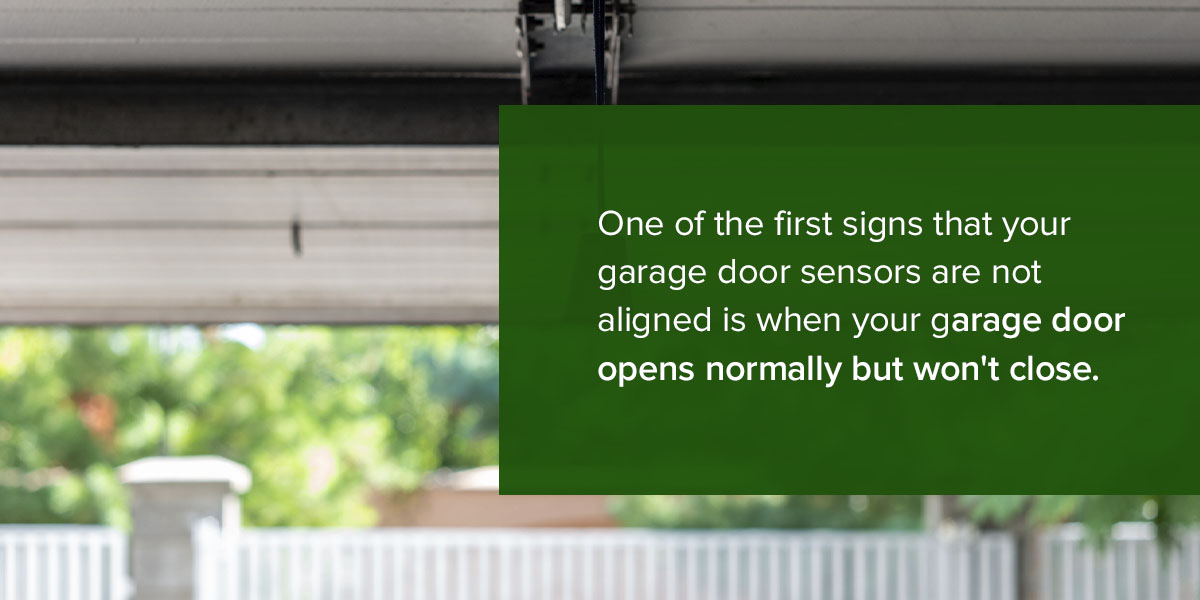
Garage door stays open: One of the first signs that your garage door sensors are not aligned is when your garage door opens normally but won’t close. If the sensors are misaligned, the door might incorrectly sense an object in the way.
The garage door closes despite an obstruction: Your garage door may have closed despite an obstruction crossing the sensor line. Early detection can help prevent this from happening.
Dirty lenses: The infrared sensors should have a clear pathway to send messages to each other. Dirty lenses can make your sensors behave as though they are misaligned.
Damaged wires: Damaged wires can cause your sensors not to align correctly. If left untreated, it can cause the alignment function in your garage doors to stop working.
Red light indicators: When you press the button on your garage remote, check the color of the flashing light. A green light means the sensor is working, and a red light means it’s faulty.
When You Need to Realign Garage Door Sensors
You may need to realign garage door sensors in several situations. Aligning garage door sensors isn’t just a one-time task—various factors can knock them out of alignment over time:
After accidental contact: Bumping sensors with a vehicle, lawn equipment, or while moving items in and out of the garage
Vibration from regular use: The constant opening and closing of your garage door can gradually shift sensor alignment
Temperature changes: Expansion and contraction from seasonal temperature fluctuations can affect mounting brackets
Recent garage door maintenance or repair: Any work done on your garage door system may inadvertently move the sensors
LiftMaster and other brand updates: After replacing batteries in wireless sensors or updating firmware on newer models
If your garage door won’t close properly or the sensors show red lights, it’s time to check the alignment. Learning how to realign garage door sensors can save you time and money on service calls.
Aligning Garage Door Sensors: How to Align and Realign LiftMaster & Other Brands
For your garage door sensors to work correctly, one sensor must be able to send information to the opposite sensor. Typically, the emitter shows a green light, and the receiver confirms that information by flashing a yellow light. Anything other than that means you should consider adjusting your garage door sensors. To align them, follow this step-by-step process:
1. Turn off the Sensors by Disconnecting the Power Supply to Your Garage
You shouldn’t need to work with live electricity, but turning the power off to your garage and pulling out the plug for your automatic door opener is always advisable. You can find the fuse that feeds your garage in your home’s breaker box. For added safety, wear electricity-resistant gloves.
2. Loosen the Screws Holding the Sensors in Place
Loosen the screws in the mounting brackets. However, you don’t want to loosen them entirely and remove the screws. Instead, unscrew them in a counter-clockwise direction until they’re loose enough that you can move the sensors. Test this by sliding the mounting brackets up and down. They should slide with ease.
3. Slide Each Garage Door Sensor Down
Slide each of the garage sensors down, one by one, as low as they can go without the screws coming loose. Do this with your bare hands, not a wrench. Using tools may cause damage and possible malfunctioning to your sensors.
4. Attach a String Between the Sensors
Once the sensors and the mounting brackets are as low as possible, get a string several inches longer than the width of your garage opening. Tie one end of the string to one sensor and mounting bracket as firmly as you can. Then, stretch the string across your garage to the opposite sensor and tie the other end to the opposite sensor.
5. Ensure the String Lays Level
Set a level underneath the string and ensure it runs evenly. If it doesn’t, rearrange the mounting brackets so the string is level from one end of the garage door to the other.
6. Tighten the Screws in Place
Once you’ve determined that the line is level and even, tighten the screws in the brackets. Test that they’re tight enough by moving the garage door sensors out of place. If they don’t move, the screws are tight enough. If they do, level the string of the sensors once more and screw them tight again. Use the level again to line up your garage door sensors to the string.
7. Remove the String and Reconnect the Power
Remove the string when you’ve confirmed that the sensors align evenly. Repower your garage and test the sensors again. Your garage door should now be fully operational after you’ve aligned the sensors.
One thing to keep in mind when aligning garage door sensors is the leveling factor. It’s vital that the leveling remains straight. The infrared line between the sensors must be able to send and receive information perfectly. Whether you’re aligning LiftMaster garage door sensors or another brand, this leveling principle applies universally. If you find yourself needing to realign garage door sensors frequently, consider having a professional check your mounting brackets for stability.
Trust Cornwell Door Service to Align Your Garage Door Sensors
Correct garage door sensor alignment is essential for improved convenience, helps prevent vehicle damage and protects people. While aligning garage door sensors is a manageable DIY task, some homeowners prefer professional help—especially when dealing with frequent misalignment or how to align garage door sensors on LiftMaster systems with advanced features. Functional sensors can give you peace of mind that you are always safe when you enter or exit your garage.
Aligning your garage sensors can be time-consuming, especially if you do it on your own. There are also some safety risks to remember as you switch off the main switch. If you need help diagnosing your garage door sensors or aligning them, consult a garage door expert. Taking care of your garage door is one of the best things you can do for your property and safety.
Cornwell Door Service has been in the garage door industry for over 40 years. Trust us as your partner in handling your garage door queries. Request a service with us today by filling out our online form. Alternatively, call us at (717) 273-9841, and one of our expert team members will help you further.
Garage Door Sensor Alignment FAQ
How Do You Line Up and Adjust Garage Door Sensors?
To line up or adjust your garage door sensors, first turn off the power, clean the lenses and loosen the mounting screws on both sensors so they can slide easily. Then, use a string or level to point them directly at each other, adjusting until the LED on the receiving sensor glows steadily to indicate a solid beam. Once aligned, you can tighten the screws and test the door to make sure it closes fully without reversing.
How Do You Install Garage Door Sensors?
The process of installing garage door sensors involves mounting brackets low on each side of the door, connecting color-coded wires, using wire nuts and aligning the sensors for a solid LED light. It’s best to leave sensor installation to professionals, as they can safely and correctly set up the sensors. They have the expertise, tools and experience to efficiently install your garage door sensors so they work properly while preventing injury.
How Do You Replace Garage Door Sensors?
Replacing garage door sensors involves unplugging the opener, removing old sensors by loosening the wing nuts and then doing the proper wiring work. It’s best to consult professionals to replace your garage door sensors safely and correctly to prevent injury. At Cornwell Door Service, we can get you scheduled, determine the proper sensor replacements and quickly get to work to restore your garage door’s function.
Why Won’t My Garage Door Close Even When There’s Nothing in the Way?
Sensors are a common reason your garage door won’t close even when there’s nothing in the way. When out of alignment, garage door sensors can incorrectly detect an object in the pathway, causing the door to reverse or stay open as a safety measure. Other reasons could include dirty sensor lenses getting in the way of the LED beam or damaged wiring to the sensors. You can check the indicator lights to see if the sensors are causing the issue. Green means they’re working, while red means faulty.