Winter Garage Door Maintenance for Pennsylvania Homes

Pennsylvania’s freezing winter temperatures, snow and ice can wreak havoc on your garage door. The best preparation starts before the first cold snap hits. Proactive maintenance can keep your door operating smoothly through the chilly season.
Get the most from your door with this go-to winter garage door preparation guide. Discover DIY maintenance tasks, troubleshooting tips and when to call for professional help.
7 DIY Cold-Weather Garage Door Maintenance Tips
Looking for ways to protect your garage door against Pennsylvania’s plummeting temperatures? Follow these seven preventive maintenance steps:
1. Lubricate All Moving Parts
Cold temperatures can put pressure on the metal components of your garage door. Lubrication reduces friction, improves cold-weather performance, prevents wear and boosts longevity.
Apply a silicone-based lubricant to the following parts:
- Springs
- Rollers
- Hinges
- Tracks
Steer clear of grease, which can harden when it gets cold. After applying the lubricant, run your door through a full operating cycle to distribute it.
2. Check and Replace Weatherstripping
Weatherstripping forms a protective seal around your garage door. It blocks cold air, stops moisture infiltration and helps maintain even interior temperatures. When the seals become worn or damaged, it can let winter weather in through the gaps.
Inspect the weatherstripping for cracks or deterioration. If you find damage, remove and replace the entire affected strip. Consider partnering with garage door professionals for weatherstripping replacement.
3. Upgrade or Add Garage Door Insulation
An insulated garage door is a must for a Pennsylvania home. Insulation slows down heat transfer, which enhances indoor comfort and reduces energy expenses.
Check the condition of your existing insulation and replace damaged panels. You can insulate an uninsulated garage door yourself using a kit with pre-cut foam boards. Look for a product with a high R-value. This number measures the insulating material’s thermal performance — the higher the value, the better it resists heat transfer.
DIY garage door insulation involves fitting the foam boards into the door panels and securing them with adhesive. For even better insulation, consider upgrading your garage door. Many modern doors use polyurethane insulation for exceptional energy efficiency and performance.
4. Perform a Balancing Test
An unbalanced garage door can affect its operation and place strain on the opener. Here’s a simple test to check your door’s balance:
- Disconnect the garage door from the opener by pulling the emergency release handle.
- Lift the door by hand to about halfway and then release it — a balanced door will stay in place. An unbalanced door may drop shut or move on its own.
- Check the door’s mobility. Does the operation feel light and smooth? If so, the door is most likely balanced. If it feels heavy or sticky, it may need adjustment.
If the test reveals an imbalance, broken springs are often the culprit. Call a garage door expert for repairs. Garage door springs can be dangerous, so avoid trying to fix them yourself.
5. Inspect the Garage Door Opener and Safety Sensors
Cold weather can affect the operation of your garage door opener. Check the opener housing for damage that could allow moisture or snow to enter. Replace the batteries in the remote if necessary.
Clean the safety sensors with a soft cloth and check their alignment by looking for a green light on the emitting sensor. If necessary, you can realign the sensors yourself. Now is a good time to test the automatic reverse function.
6. Clean the Tracks and Check the Rollers
Dirty tracks can disrupt your garage door’s movement. Use a toothbrush or other soft brush to clean any dirt, small stones or debris from the tracks. Examine the rollers — if you notice wear or damage, schedule a service with your local garage door technician. DIY roller replacement could compromise the tracks.
7. Install a Garage Heater
Just like you, your garage door wants to stay warm in winter. Placing a heater in your garage is a simple, cost-effective way to maintain even indoor temperatures. This solution also works for stored items. Besides helping your garage door, it can prevent sensitive items like paints or liquids from freezing.
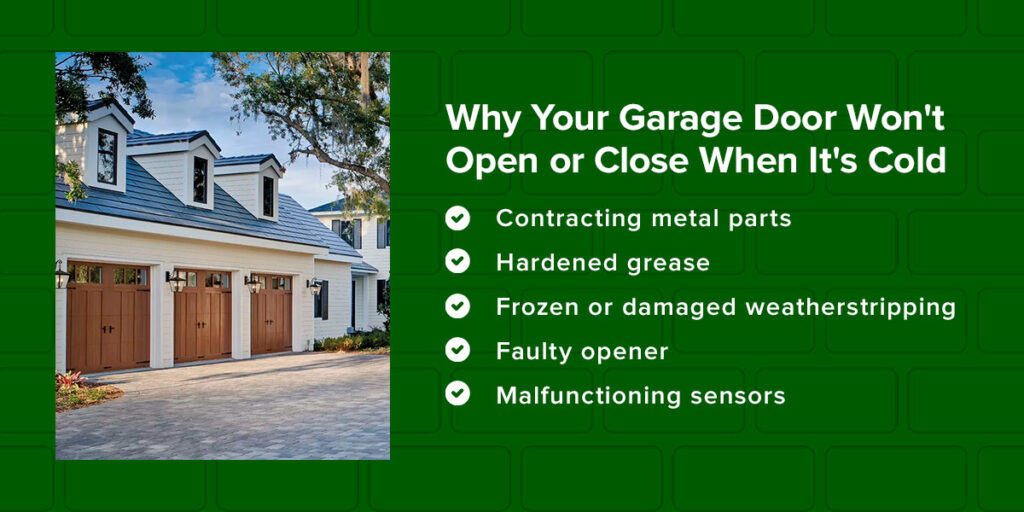
Why Your Garage Door Won’t Open or Close When It’s Cold
Pennsylvania’s winter mix of low temperatures and icy conditions can affect how your door works. Here’s why:
- Contracting metal parts: Extreme cold can cause the metal components of your garage door to shrink. This thermal contraction impacts how the parts perform. Effective weather sealing and lubrication can avoid this issue.
- Hardened grease: The grease in your garage door can harden in freezing temperatures. To prevent this, apply a solvent to the grease and use a silicone-based lubricant on moving parts.
- Frozen or damaged weatherstripping: When ice builds up around your garage door, it can freeze the bottom seal to the ground. Forcing it open may strip away the weatherstripping. Clear snow or ice from around the door as soon as possible and sprinkle salt where the seal meets the ground to prevent freezing.
- Faulty opener: Cold conditions can impact the batteries in your opener. If changing them doesn’t solve the problem, get a professional to repair or replace the opener.
- Malfunctioning sensors: Ice, snow or condensation on your garage door’s sensors can disrupt communication. Check and clean the sensors often.
Benefits of Winter Garage Door Preparation
Making garage door care part of your Pennsylvania winter home maintenance plan has plenty of benefits:
Lowers Energy Bills and Improves Comfort
A well-insulated garage door stops cold from sneaking into attached spaces. Over time, this small improvement can add up to big savings by reducing demand on your heating system. According to ENERGY STAR, adding insulation to your home can result in up to 10% savings on energy bills. As a bonus, your home stays warmer and cozier.
Protects Vehicles and Belongings
Your garage likely stores valuable items, like your car or exercise equipment. An insulated and sealed garage door helps protect these belongings against extreme weather. It can also make it easier to start your vehicle in cold conditions.
Prevents Burst Pipes
Many PA homes have pipes running through the garage. Plummeting temperatures can cause the water in the pipes to freeze. A burst pipe is an expensive plumbing emergency. Winterizing your garage door can help avoid this problem by regulating indoor temperatures.
Extends the Lifespan of Your Garage Door
A well-maintained door lasts longer. Preventive maintenance keeps your garage door and its components in top condition. This approach prevents premature wear, boosts performance and prolongs your garage door’s life.
When to Call a Professional
While DIY care is safe for some routine tasks, others require the expertise of a trained professional. Call a trusted garage door technician for the following issues:
- Spring replacements: Garage door springs hold a significant amount of tension. Trying to replace a spring yourself can lead to serious injury and is best left to the professionals.
- Track adjustments: A garage door that’s left its tracks is a safety hazard. Trained technicians know safe, reliable techniques to adjust and realign the tracks.
- Unresponsive or slow movement: Operation issues often need technical knowledge to fix.
- Scheduled tuneups: An annual service keeps your garage door in peak condition. A technician will lubricate moving parts, replace worn components and identify potential issues.
- Unusual noises: Grinding, banging or rattling can indicate deeper mechanical faults. An experienced pro can diagnose and resolve the problem to prevent further damage.
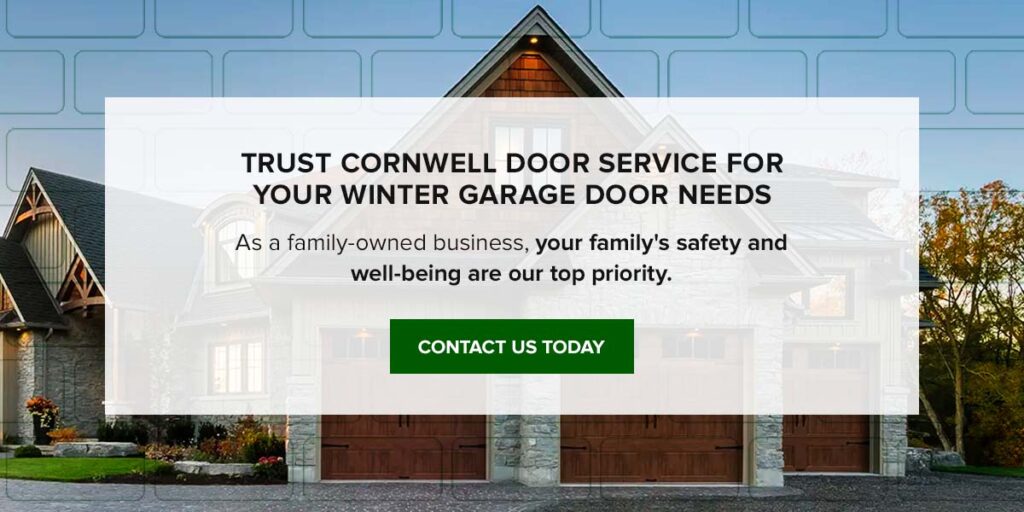
Trust Cornwell Door Service for Your Winter Garage Door Needs
Since 1972, PA homeowners have relied on Cornwell Door Service to care for their garage doors. Our local team is well-versed in Pennsylvania’s weather conditions. From reliable garage door winter repairs to preventive maintenance, we keep your door winter-ready. As a family-owned business, your family’s safety and well-being are our top priority.
Call us at 844-891-7971 or schedule your service online today.
The Pennsylvania Homeowner’s Guide to Garage Door Noise Reduction
A loud garage door can become an everyday frustration, especially if it wakes up the whole house or cuts through the quiet of a peaceful neighborhood. For homeowners in Pennsylvania, where weather and wear often go hand in hand, garage door noise is more than a nuisance. It can signal a deeper issue with your system.
In this guide, we’ll walk through what’s likely causing the noise, why it happens more often in our part of the country and how working with a professional can help restore quiet to your garage.
Understanding Garage Door Noise
Garage doors go through a lot. Between seasonal weather changes, repeated use and years of natural wear, it’s no wonder they can start to groan or grind over time. The good news? Most noises have a root cause and a fix.
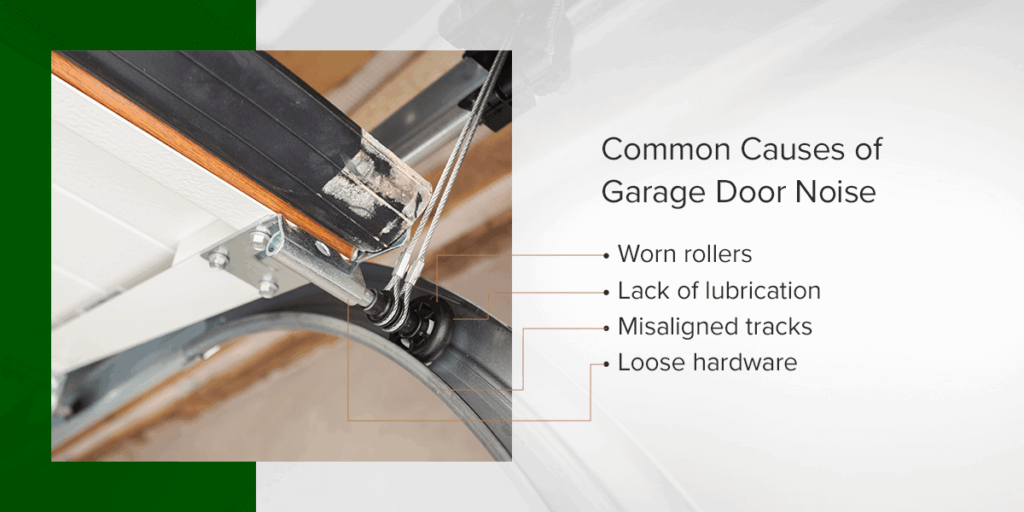
If your garage door has started making odd sounds lately, it’s likely one of these common issues at play:
- Worn rollers: These small but mighty parts help guide the door along its tracks. When they wear down or crack, they can cause rattling or screeching sounds.
- Lack of lubrication: Dry hinges, rollers and springs create more friction, which leads to louder operation and unnecessary stress on your system — plus, all opener parts operate way better when they’re lubricated. The weather can also change the consistency of your system’s lubrication.
- Misaligned tracks: If your door seems to struggle as it opens or closes, its tracks might be slightly off. Track misalignment often causes scraping or banging.
- Loose hardware: Over time, screws and bolts can start to wiggle loose, especially in high-use households. That vibration often turns into noise.
In Pennsylvania, the weather throws a few extra challenges into the mix. Your garage door sees every kind of weather, sometimes in the same week. Also, openers are particularly susceptible to weather changes. Here are a few ways our local climate can add to the racket:
- Cold winters and hot summers: Temperature swings cause metal components to expand and contract, impacting how smoothly everything runs. With the sun’s rays, the direction your garage door and opener face affects how it performs. The sun can trick your garage door’s photo eyes into thinking there’s something in the way, leading to it not closing.
- Humidity and rust: Moisture in the air, especially during spring and summer, can create rust buildup on steel components, adding strain and sound.
- Snow and ice: Snow and ice build up around the base of the door or along the tracks, which can block smooth operation and make the system grind or shudder. If you have a wooden door, it can freeze over or expand from water during the winter.
If any of these sound familiar, it’s probably time to call in the pros. The team at Cornwell Door Service can pinpoint the problem and get your garage door back to quiet, reliable operation.
Professional Solutions for Pennsylvania Garage Door Repair
Some noises might be reduced temporarily with a little lubrication or by tightening a screw — but that usually only buys you a little time. For lasting results, it’s worth turning to a professional who can safely assess the issue and make the right long-term repairs. These are a few of the solutions our technicians might recommend:
- Spring replacement: When springs wear out or weaken, they can throw the whole system out of balance and create extra noise. Swapping in a new set helps restore smooth, safe motion.
- Garage door opener service or upgrade: An aging or overworked garage door opener can get noisy over time. Today’s options are designed for quieter performance and may include features like smartphone control and soft-start motors.
- Insulation: Insulated doors help with energy efficiency, reduce vibration and dampen sound as the door opens and closes.
Cornwell Door Service is here to make these fixes simple. Our team works with homeowners across Central Pennsylvania to quiet down loud doors and extend the life of every system we service.
Request Estimate Request Service
Preventing Future Garage Door Noise
Once your garage door is running quietly again, the next step is keeping it that way. Ongoing maintenance is one of the best ways to avoid surprise repairs and loud mornings.
A few seasonal check-ins can go a long way toward keeping things quiet year-round:
- Keep moving parts lubricated, especially before temperature extremes in summer or winter.
- Watch for rust or buildup on springs and rollers.
- Clear snow or ice that can interfere with the door’s path.
- Listen for changes in sound that might signal a new issue.
- Keep your gutters clear to prevent pools of water from forming around your garage door.
You don’t have to stay on top of it alone. With a maintenance plan from Cornwell Door Service, you get expert service for all makes and models. Here’s what’s included:
- Seasonal tuneups that account for Pennsylvania’s changing weather.
- Routine checks that catch small problems before they become big ones.
- Lubrication and alignment services that keep your door running quietly and smoothly.
It’s an easy way to protect your garage door investment and enjoy a quieter, more dependable entry to your home.
Why Garage Door Noise Reduction Matters More Than You Think
It’s easy to ignore a noisy garage door until it starts waking your kids or disrupting your early mornings. But beyond being an annoyance, those sounds are often your system’s way of asking for help. A squeak here or a bang there can point to worn parts, extra strain on your opener or even potential safety risks if left unchecked. In homes across Central Pennsylvania, the garage door is one of the most-used entry points. That means wear happens faster and minor issues can grow quickly. Catching and correcting the source of noise early helps prevent bigger — and costlier — problems later on.
Working with a pro at Cornwell Door Service gives you more than a quiet fix. You get peace of mind that your system is safe, efficient and ready for whatever the seasons throw at it. If something sounds off, it’s probably time to have us take a look.
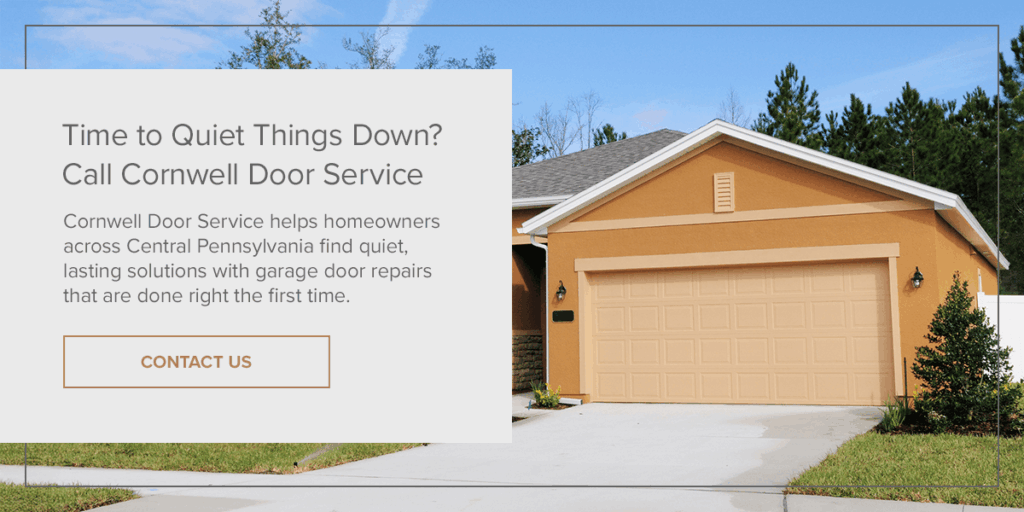
Time to Quiet Things Down? Call Cornwell Door Service
A squeaky garage door might seem like a small issue at first, but it’s often a sign that your system needs a little attention. Cornwell Door Service helps homeowners across Central Pennsylvania find quiet, lasting solutions with garage door repairs that are done right the first time. If your garage door has gotten noisier lately, don’t wait. Contact Cornwell Door Service today and get back to enjoying the calm.
How to Reprogram Garage Door Openers: Complete Programming Guide
Programming garage door opener systems can seem challenging, but it becomes straightforward with proper guidance. Whether you need to reprogram garage door opener after a power outage, program a new garage door opener you just purchased, or set up a garage door remote control, this guide provides easy-to-follow steps. Learn how to program your garage door opener for LiftMaster, Chamberlain, Genie, and other major brands. This comprehensive guide covers everything from initial setup to reprogramming existing systems.
What You Need to Program Your Garage Door Opener
You’ll need to gather a few essential items to program a garage door opener like the Liftmaster. Ensure you have a sturdy ladder and potentially someone to steady it so you can safely reach the opener, which is typically mounted on the ceiling. You’ll also need the remote control and access to the keypad you plan to program.
Having the user manual for your specific Liftmaster model on hand is also beneficial, as it contains useful information, detailed instructions and troubleshooting tips. If your garage is dimly lit or you are working at night, a flashlight will be helpful to see what you are doing.
With these items ready, you’ll be well-prepared to program your garage door opener efficiently and safely, especially after reading the guidelines below.
How to Program and Reprogram Your Garage Door Opener and Remote Control
Liftmaster garage door opener programming is a straightforward process you can complete in just a few simple steps. These steps will guide you through each action, from locating the necessary buttons to testing your remote control.
1. Find the Learn Button
To program your garage door opener, the first step is to find the Learn button on the Liftmaster unit. You can typically find this button near the antenna wire on the side or rear of the motor unit. The unit’s light lens or a small panel will likely cover it. Depending on the model, the Learn button can be in various colors, such as red, orange, yellow, purple or green.
2. Press the Learn Button
Once you have located the Learn button, press and release it. Doing this will activate the programming mode. An indicator light will turn on or start blinking, signaling the unit is ready to receive a new code. Move on to the next step within 30 seconds after having pressed it to ensure the programming mode remains active. Otherwise, you will need to start the process over.
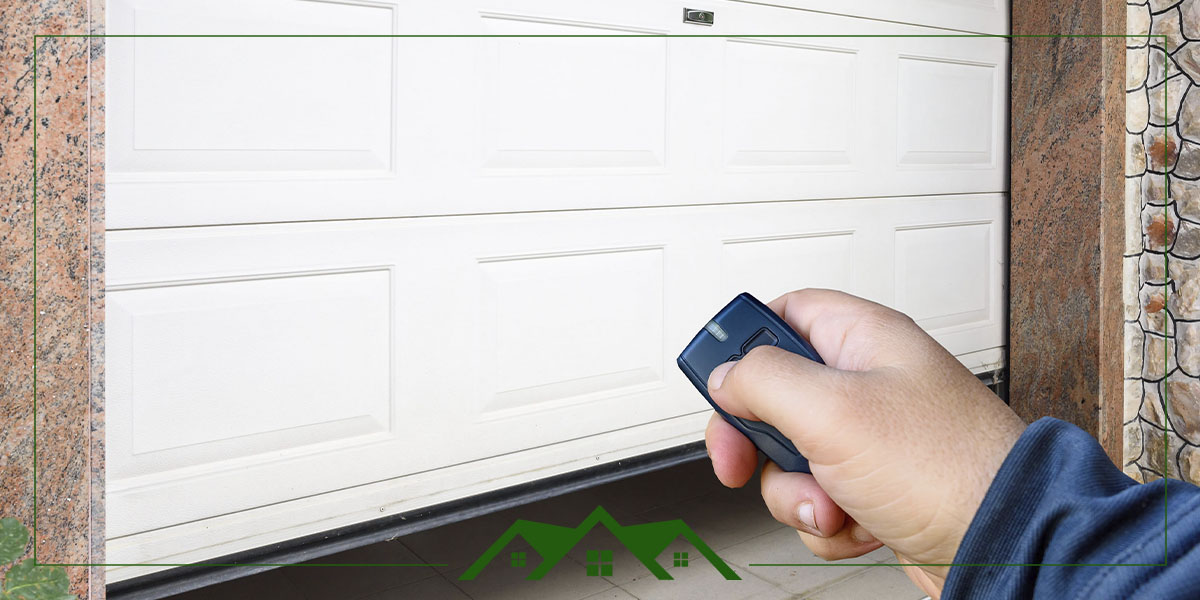
3. Program the Garage Door Remote Control
With the Learn button activated, take your remote control and press the button you would like to program. Keep the button held down until the motor unit’s indicator light blinks or turns off, usually taking a few seconds. This indicates that you have successfully paired the remote control with the garage door opener.
4. Test Remote Control Functions
Once you have programmed the remote, it is essential to test it to be sure it works correctly. Be sure to stand away from the garage door and press the button you have programmed on the remote. Once pressed, the garage door should then begin opening or closing. If the door does not move, go through the steps to program it again to make sure the remote is paired correctly with the opener. If you’re unable to pair your remote and opener, Cornwell Door Service can help.
5. Repeat for Additional Remotes
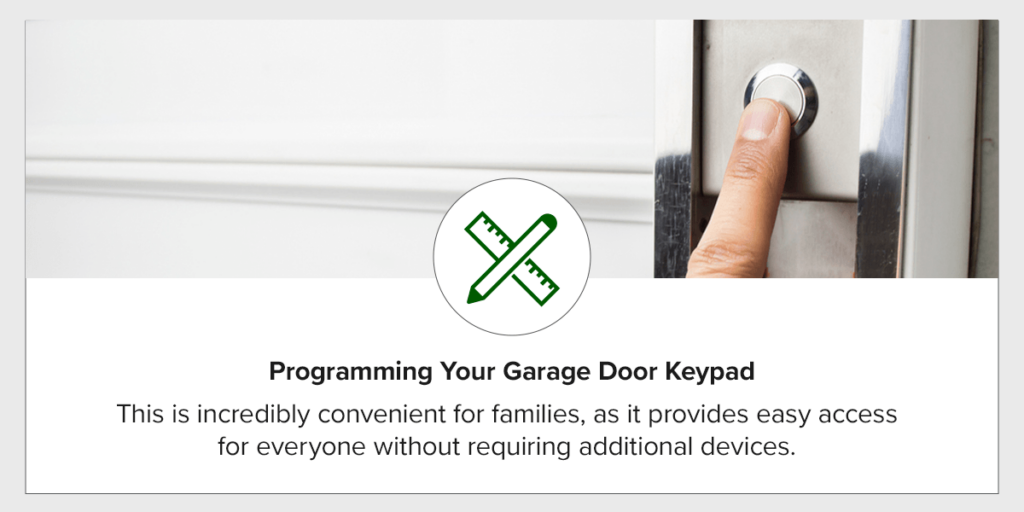
If you want to program additional garage door remote controls, go through the steps above for each. Whether you’re programming a new garage door opener with multiple remotes or adding remotes to an existing system, the process remains the same. Remember to press the Learn button on the motor unit before programming each new remote. This will allow you to open and close your garage door using multiple remotes, providing convenience and flexibility for all household members.
Frequently Asked Questions About Programming and Reprogramming Garage Door Openers
How do you program your garage door opener after a power outage?
After a power outage, you may need to reprogram garage door opener remotes and keypads. First, check if your remotes still work—many modern openers retain programming through outages. If they don’t work, follow the standard programming garage door opener process: press the Learn button on the motor unit, then press the button on your remote within 30 seconds. Repeat for each remote and keypad. Reprogramming garage door opener systems after power loss typically takes just 5-10 minutes for all devices.
Can you reprogram garage door opener without the Learn button?
Most modern garage door openers require the Learn button to reprogram garage door opener systems. However, some older models allow programming garage door opener through the remote itself by holding specific button combinations. Check your owner’s manual for model-specific instructions. If you can’t locate the Learn button or your manual, professional help may be needed. For LiftMaster and Chamberlain models, the Learn button is essential for reprogramming garage door opener security codes.
How to program a new garage door opener you just installed?
When programming a new garage door opener, start fresh by clearing any existing codes (hold the Learn button for 6 seconds until the light turns off). Then follow the standard programming garage door opener process for each remote: press the Learn button, then press your remote button within 30 seconds. For keypads when programming new garage door opener systems, press Learn, enter your 4-digit PIN, then press Enter. This initial programming of garage door opener typically takes 10-15 minutes for all remotes and accessories.
Why won’t my garage door opener reprogram?
If you’re having trouble reprogramming garage door opener systems, check these common issues: 1) Dead remote batteries—replace before attempting to reprogram garage door opener, 2) You’re not pressing the Learn button within the 30-second window, 3) Interference from other devices—turn off nearby electronics while programming garage door opener, 4) The motor unit’s receiver may be faulty, 5) You’re pressing the wrong button on multi-button remotes. If basic troubleshooting doesn’t work when reprogramming garage door opener, contact a professional.
How to program garage remote control for multiple doors?
To program garage remote control for multiple doors, you’ll need a multi-button remote (most have 3 buttons). For each door, press that garage’s Learn button, then press the corresponding button on the remote you want to assign. Repeat for each door. When programming garage door remote control for multiple openers, label each button so family members know which controls which door. This programming garage door opener process works identically for each door—you’re just assigning different buttons to different openers.
Do you need to reprogram garage door opener when replacing the remote?
Yes, when replacing a lost remote, you should reprogram garage door opener by clearing all previous codes first (hold Learn button 6-10 seconds). This prevents the old remote from working and enhances security. Then follow standard programming garage door opener steps for your new remote(s). If you’re just adding a new remote without replacing, you can skip the clearing step and simply program the new garage door opener remote using the Learn button method.
How is reprogramming different from programming garage door opener?
Programming garage door opener refers to the initial setup or adding new remotes to an existing system. Reprogramming garage door opener typically means clearing existing codes and setting up fresh codes, usually done for security reasons or troubleshooting. The actual button-pressing process is identical—the difference is that reprogramming garage door opener usually starts with clearing all previous codes by holding the Learn button for 6-10 seconds. Both programming and reprogramming garage door opener systems use the same Learn button method.
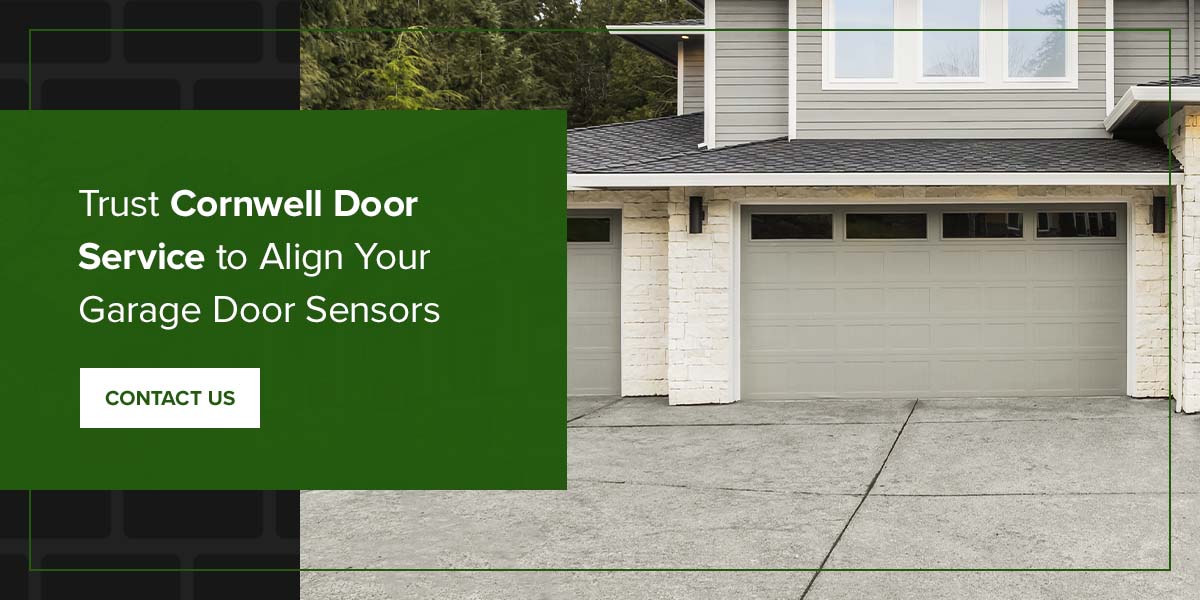
How to Align Your Garage Door Sensors
Your garage door sensors are essential in keeping everyone at your home safe. As a homeowner, you need to know what automatic garage door sensors are and how to tell if they’re misaligned. Aligning garage door sensors takes some practice, but this guide will show you exactly how to align garage door sensors whether you have a LiftMaster, Chamberlain, or other brand system. Following a step-by-step plan can streamline the process and help keep your cars and family safe.
Aligning garage door sensors is a straightforward process that works across all major brands including LiftMaster, Chamberlain, Genie, and Overhead Door. If you need to realign garage door sensors that have been knocked out of position or are showing red indicator lights, follow these seven steps. This method for how to align garage door sensors LiftMaster models also applies to most other brands with minor variations.
What Are Garage Door Sensors?
Garage door sensors work by sensing if an object crosses their path. If they detect anything, such as a car, person, pet or toy, in the way as the door closes, the system reopens the door. The sensors work by using two photo-eyes, which emit an infrared line across the garage’s horizontal opening a few inches off the ground. One photo-eye transmits information, and the other photo-eye receives information.
These two sensors must work well together and should be free from fault. Properly working sensors help prevent car damage and bodily injury and are required by U.S. law.
How to Tell If Your Garage Door Sensors Are Not Aligned
Your garage door will show signs of malfunctioning when it closes and opens in unusual ways. You may also need to exit your vehicle to open and close your garage. Look for signs of door malfunctions and other indicators around the mechanical workings of your garage doors:
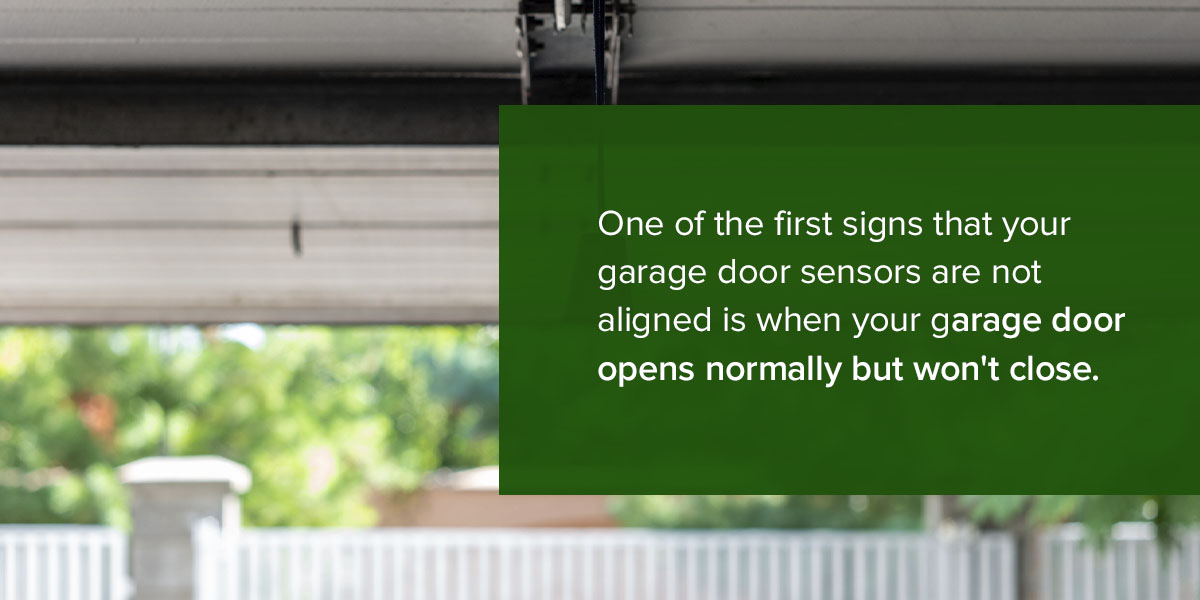
- Garage door stays open: One of the first signs that your garage door sensors are not aligned is when your garage door opens normally but won’t close. If the sensors are misaligned, the door might incorrectly sense an object in the way.
- The garage door closes despite an obstruction: Your garage door may have closed despite an obstruction crossing the sensor line. Early detection can help prevent this from happening.
- Dirty lenses: The infrared sensors should have a clear pathway to send messages to each other. Dirty lenses can make your sensors behave as though they are misaligned.
- Damaged wires: Damaged wires can cause your sensors not to align correctly. If left untreated, it can cause the alignment function in your garage doors to stop working.
- Red light indicators: When you press the button on your garage remote, check the color of the flashing light. A green light means the sensor is working, and a red light means it’s faulty.
When You Need to Realign Garage Door Sensors
You may need to realign garage door sensors in several situations. Aligning garage door sensors isn’t just a one-time task—various factors can knock them out of alignment over time:
- After accidental contact: Bumping sensors with a vehicle, lawn equipment, or while moving items in and out of the garage
- Vibration from regular use: The constant opening and closing of your garage door can gradually shift sensor alignment
- Temperature changes: Expansion and contraction from seasonal temperature fluctuations can affect mounting brackets
- Recent garage door maintenance or repair: Any work done on your garage door system may inadvertently move the sensors
- LiftMaster and other brand updates: After replacing batteries in wireless sensors or updating firmware on newer models
If your garage door won’t close properly or the sensors show red lights, it’s time to check the alignment. Learning how to realign garage door sensors can save you time and money on service calls.
Aligning Garage Door Sensors: How to Align and Realign LiftMaster & Other Brands
For your garage door sensors to work correctly, one sensor must be able to send information to the opposite sensor. Typically, the emitter shows a green light, and the receiver confirms that information by flashing a yellow light. Anything other than that means you should consider adjusting your garage door sensors. To align them, follow this step-by-step process:
1. Turn off the Sensors by Disconnecting the Power Supply to Your Garage
You shouldn’t need to work with live electricity, but turning the power off to your garage and pulling out the plug for your automatic door opener is always advisable. You can find the fuse that feeds your garage in your home’s breaker box. For added safety, wear electricity-resistant gloves.
2. Loosen the Screws Holding the Sensors in Place
Loosen the screws in the mounting brackets. However, you don’t want to loosen them entirely and remove the screws. Instead, unscrew them in a counter-clockwise direction until they’re loose enough that you can move the sensors. Test this by sliding the mounting brackets up and down. They should slide with ease.
3. Slide Each Garage Door Sensor Down
Slide each of the garage sensors down, one by one, as low as they can go without the screws coming loose. Do this with your bare hands, not a wrench. Using tools may cause damage and possible malfunctioning to your sensors.
4. Attach a String Between the Sensors
Once the sensors and the mounting brackets are as low as possible, get a string several inches longer than the width of your garage opening. Tie one end of the string to one sensor and mounting bracket as firmly as you can. Then, stretch the string across your garage to the opposite sensor and tie the other end to the opposite sensor.
5. Ensure the String Lays Level
Set a level underneath the string and ensure it runs evenly. If it doesn’t, rearrange the mounting brackets so the string is level from one end of the garage door to the other.
6. Tighten the Screws in Place
Once you’ve determined that the line is level and even, tighten the screws in the brackets. Test that they’re tight enough by moving the garage door sensors out of place. If they don’t move, the screws are tight enough. If they do, level the string of the sensors once more and screw them tight again. Use the level again to line up your garage door sensors to the string.
7. Remove the String and Reconnect the Power
Remove the string when you’ve confirmed that the sensors align evenly. Repower your garage and test the sensors again. Your garage door should now be fully operational after you’ve aligned the sensors.
One thing to keep in mind when aligning garage door sensors is the leveling factor. It’s vital that the leveling remains straight. The infrared line between the sensors must be able to send and receive information perfectly. Whether you’re aligning LiftMaster garage door sensors or another brand, this leveling principle applies universally. If you find yourself needing to realign garage door sensors frequently, consider having a professional check your mounting brackets for stability.
Trust Cornwell Door Service to Align Your Garage Door Sensors
Correct garage door sensor alignment is essential for improved convenience, helps prevent vehicle damage and protects people. While aligning garage door sensors is a manageable DIY task, some homeowners prefer professional help—especially when dealing with frequent misalignment or how to align garage door sensors on LiftMaster systems with advanced features. Functional sensors can give you peace of mind that you are always safe when you enter or exit your garage.
Aligning your garage sensors can be time-consuming, especially if you do it on your own. There are also some safety risks to remember as you switch off the main switch. If you need help diagnosing your garage door sensors or aligning them, consult a garage door expert. Taking care of your garage door is one of the best things you can do for your property and safety.
Cornwell Door Service has been in the garage door industry for over 40 years. Trust us as your partner in handling your garage door queries. Request a service with us today by filling out our online form. Alternatively, call us at (717) 273-9841, and one of our expert team members will help you further.
Garage Door Sensor Alignment FAQ
How Do You Line Up and Adjust Garage Door Sensors?
To line up or adjust your garage door sensors, first turn off the power, clean the lenses and loosen the mounting screws on both sensors so they can slide easily. Then, use a string or level to point them directly at each other, adjusting until the LED on the receiving sensor glows steadily to indicate a solid beam. Once aligned, you can tighten the screws and test the door to make sure it closes fully without reversing.
How Do You Install Garage Door Sensors?
The process of installing garage door sensors involves mounting brackets low on each side of the door, connecting color-coded wires, using wire nuts and aligning the sensors for a solid LED light. It’s best to leave sensor installation to professionals, as they can safely and correctly set up the sensors. They have the expertise, tools and experience to efficiently install your garage door sensors so they work properly while preventing injury.
How Do You Replace Garage Door Sensors?
Replacing garage door sensors involves unplugging the opener, removing old sensors by loosening the wing nuts and then doing the proper wiring work. It’s best to consult professionals to replace your garage door sensors safely and correctly to prevent injury. At Cornwell Door Service, we can get you scheduled, determine the proper sensor replacements and quickly get to work to restore your garage door’s function.
Why Won’t My Garage Door Close Even When There’s Nothing in the Way?
Sensors are a common reason your garage door won’t close even when there’s nothing in the way. When out of alignment, garage door sensors can incorrectly detect an object in the pathway, causing the door to reverse or stay open as a safety measure. Other reasons could include dirty sensor lenses getting in the way of the LED beam or damaged wiring to the sensors. You can check the indicator lights to see if the sensors are causing the issue. Green means they’re working, while red means faulty.
Garage Door Keypad Troubleshooting Guide
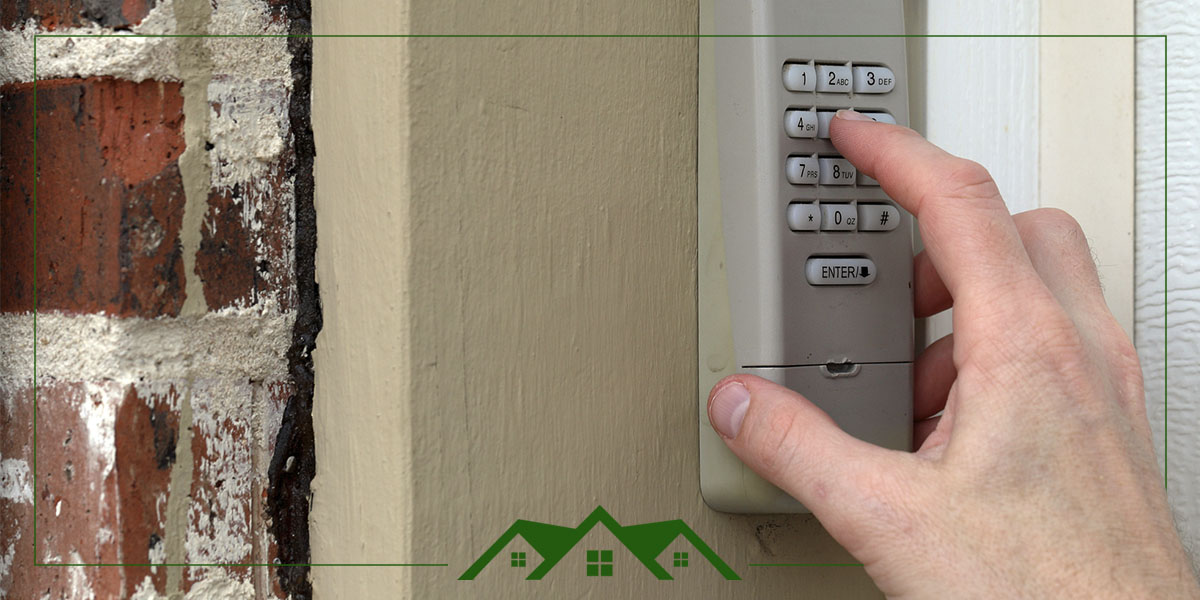
If you need to fix your garage door keypad, there are various possible explanations for why it stopped working. Whether it’s a LiftMaster keypad not working or a Chamberlain garage door keypad that needs resetting, you may need to clean your keypad or replace the batteries. This guide will help you troubleshoot your garage keypad until you find the best solution. You may need to clean your keypad or replace the batteries. Troubleshoot your garage keypad until you find the best solution for your garage door.
A keypad is a handy tool, and keeping your garage keypad working well helps ensure streamlined trips to and from home. Place the efficacy of your garage door as your top priority as you navigate the possible solutions.
Possible Causes of Garage Door Keypad Not Working
Your garage door keypad is very useful, especially if you don’t have a remote. For this reason, ensuring that your garage door opener keeps working at its best will benefit your schedule and the function of your garage door. Here are some reasons why your garage door keypad may not be working:
- Keys stuck to the pads: The keys getting stuck to the pads are common. Dirt and debris trapped under the keys can cause them to stick to the pad.
- Issue with your PIN: Usually, you get or set a temporary PIN when you get your garage door keypad. Once the PIN expires, you should reprogram it with a new one. If your schedule is busy, you can easily forget to set a new PIN or punch in the wrong one. This can cause your system to lock.
- Dead keypad batteries: The problem may be dead batteries in your garage door keypad. Check if dead batteries are the culprit for why your keypad may not be working.
- LiftMaster or Chamberlain keypad stopped working: If your LiftMaster keypad stopped working suddenly, it could be due to programming issues, battery depletion, or interference. LiftMaster and Chamberlain keypads may need reprogramming after power outages or battery changes.
- Frayed wires: Frayed and poorly connected wires can lead to your keypad needing fixing. Sometimes, wear and tear due to outside elements can disconnect the cables from the keypad.
- A malfunctioning code: A malfunction can happen for various reasons. Often, a code needs resetting when you reboot the keypad, change the batteries or put in an incorrect PIN too many times. An older keypad may simply not recognize a PIN any longer.
- An old or worn-out keypad: Take note once your keypad looks battered by the elements. Check for locations where the casing may be loose or rain and moisture can penetrate. Such cracks and holes usually cause your keypad to malfunction. If you’ve tried different troubleshooting remedies but nothing seems to help, you may need a new keypad.
- Malfunctioning buttons: Check for malfunctioning buttons on your keypad by changing the code. Select a new four-digit PIN with completely new numbers not in your current code. If this works, there might be a poor connection between the buttons. Age, damage, dirt, and wear and tear may cause malfunctioning buttons.
How to Reset Your Garage Door Keypad
You can try several things to reset your garage door keypad if it’s not working correctly. Keep in mind that some solutions are more intricate than others. It’s best to get the help of a professional if you need clarification on how to reset a garage door keypad.
1. Clean the Keypad
A good cleaning can go a long way to keep your keypad working at its best. Clean your keypad on the outside with an alcohol-based solution to eliminate oil and debris. Wipe off any grime and dirt between the buttons, being careful not to cause any damage.
If you have a remote, first wipe the outside of the remote with a cleaner. Next, open up your remote. Brush out any debris and dust with a soft brush before removing the keypad from your remote, if possible. Clean the inside around the keys in your garage remote before replacing the keypad again. Finally, close up your garage remote.
2. How to Reset Your Chamberlain or LiftMaster Garage Door Keypad PIN
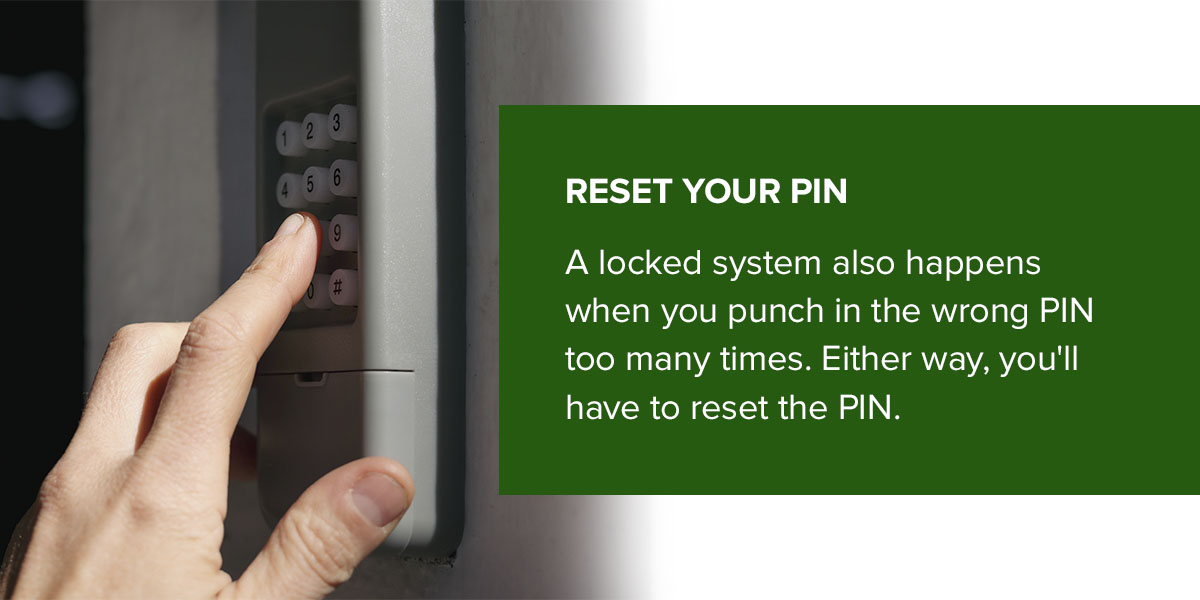
This method works for fixing garage door keypads across most major brands including LiftMaster, Chamberlain, and Overhead Door models. A garage door that won’t open from the outside but closes from the inside could mean an expired PIN. A locked system also happens when you punch in the wrong PIN too many times. Either way, you’ll have to reset the PIN. While every model is different, here are the basic steps for how to change the code on a garage door keypad:
- Your owner’s manual should have a four-digit unlocking code.
- When you enter this code, a light on your motor may blink.
- When you see the blinking, press the release button on the unit.
- You should now be able to reset your PIN according to the manufacturer’s instructions.
If you cannot locate your manual, the manufacturer’s website should also have instructions on resetting your PIN.
3. Replace the Keypad
Replacing the entire keypad is one way to reset a garage door keypad without a code. Even though a casing protects your garage door keypad, it can still be vulnerable to harsh elements and damage. Sometimes, it’s best to replace your keypad entirely.
4. Replace Your Batteries
If your garage keypad isn’t working, check the batteries. It’s easy to forget to replace your keypad batteries after a while. A 9-volt or 12-volt battery works for most models. If your garage door keypad is not working after changing the battery, you’ll have to reprogram it. This is common across different garage door systems after replacing the batteries.
5. Check for Frayed Wiring
Open your garage door keypad and look for frayed wiring that doesn’t connect to the right keys. Carefully detach each loose wire and reattach it to the relevant key. Do this one wire at a time to avoid mixing the cables. Ensure the attachments are secure, and then put the keypad back together.
6. Check for Surface Interference
Sometimes, the metal surface that your garage door keypad is mounted to can interfere with its wireless function. Try to take your keypad down and punch in the PIN again. If the PIN works now, insert a wooden or plastic buffer between the mounting surface and your device.
7. Reboot the System
A reboot can help fix a garage door keypad if you’ve tried almost everything. It also clears your garage door system of any memory and allows it to reset itself. Turn off your garage door opener. Then, unplug the entire system for five minutes before you plug it in again. Restart the system step by step and see if it makes a difference.
This system reboot can fix garage door keypad problems across all major brands, including when your LiftMaster or Chamberlain keypad becomes unresponsive.
Choose Cornwell Door Service for Your Garage Door Keypad Needs
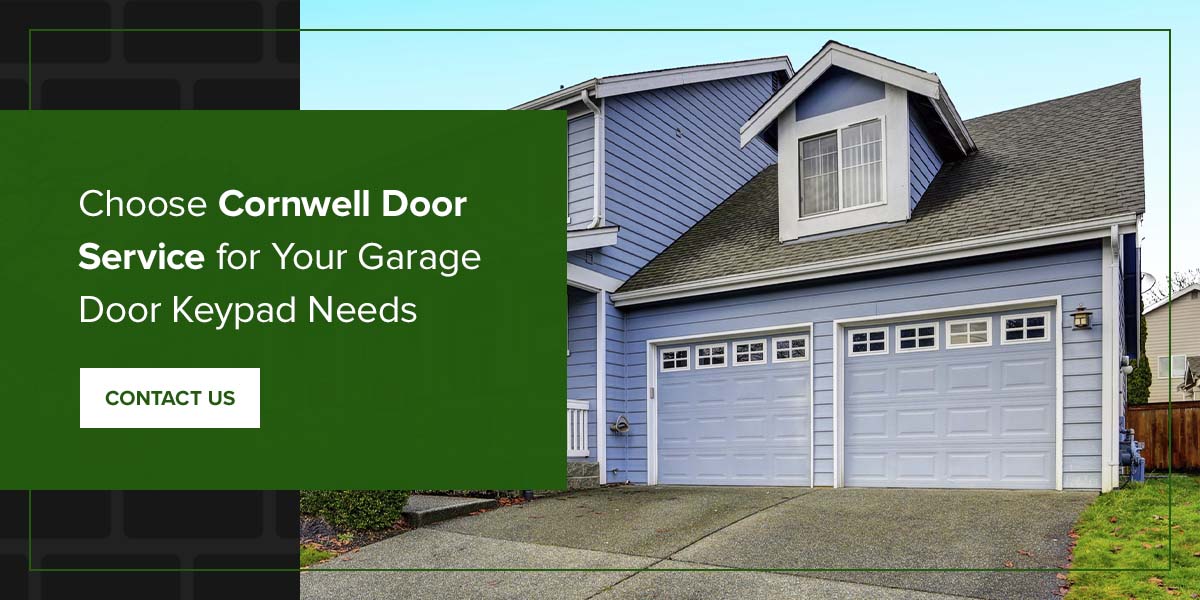
This garage door keypad troubleshooting guide should help you reset your keypad. If you’re stuck and need help trying these steps or will feel more comfortable with a professional by your side, we at Cornwell Door Service can help. With extensive experience handling garage doors in Lebanon, Pennsylvania, we will ensure your schedule isn’t affected by a faulty garage door.
Our team has over 200 years of combined service experience to bring you the best solution for your garage door. We will make sure that you stay informed throughout the process. You can schedule a service with us to work around your time or call us at (717) 273-9841 to get your garage door keypad back on track!
Frequently Asked Questions About Garage Door Keypads
Why is my Chamberlain garage door keypad not working?
For Chamberlain keypads, check the battery and make sure the keypad is within range. If the keypad flashes but doesn’t open the door, you may need to reprogram it. Refer to the Chamberlain manual for model-specific troubleshooting.
What should I do if my garage door keypad is blinking but not working?
If your garage door keypad is blinking and won’t open, this usually indicates a battery issue, incorrect code entry, or the need for reprogramming. This is especially common with LiftMaster keypads. Replace the battery first, then double-check your code. If your LiftMaster keypad is not working after these steps, you may need to reset the entire system following your manual’s instructions.
Can the weather affect my garage door keypad?
Yes, extreme cold, heat, or moisture can impact the function of your keypad by causing electrical failures or sticking buttons. Consider weatherproofing or replacing old units exposed to the elements.
My LiftMaster keypad stopped working after replacing the battery. What should I do?
When a LiftMaster keypad stopped working after a battery replacement, you’ll typically need to reprogram it. Most LiftMaster and Chamberlain systems require reprogramming after battery changes. Follow your owner’s manual to enter the learn mode and reset your PIN. If you’re still having trouble with your LiftMaster keypad not working, consider checking for wireless interference or contacting a professional.
Reasons Why Your Garage Door Won’t Close
A garage door that refuses to close can be incredibly frustrating. It exposes your vehicles and other stored belongings to the outdoors, reducing that critical layer of home security. Additionally, an open garage door lets in hot or cold air during the harsh summer and winter seasons.
So, why isn’t your garage door closing? Read on to explore some common reasons for this garage door malfunction and what you can do to fix it.
Why Won’t My Garage Door Close?
Here are some possible reasons your garage door won’t close.
1. Dead Transmitter Batteries
Your garage uses power from the transmitter to open and close the door. If the transmitter’s batteries are dead, it cannot signal the garage system to operate the door. A remote that only works occasionally can indicate a weak transmitter battery.
To check if you have a weak or dead battery, try using the wall controls to close the door. If it closes successfully, replace your transmitter batteries or call a professional to help you.
2. Damaged or Misaligned Tracks
Over time, the weight of the door and other factors can cause the tracks to misalign. If you notice the tracks aren’t completely parallel, call a garage door service provider like Cornwell Door immediately. A severely unbalanced garage door can fall off the tracks and injure someone.
Warped or bent tracks can also prevent your door from closing. You’ll need to have new tracks installed if the damage is significant.
3. Obstructed Sensors
Photo eye sensors are located on each side of the door. They send signals to each other when the door closes. Dirty sensors can interrupt these signals, preventing the door from closing. Simply wipe the sensors clean if they appear dirty or smudged.
Misaligned sensors are another possible issue. The sensors must face each other to send signals and close the door. In this case, you can adjust the sensors to align them. It is a great practice to do an occasional check for any malfunctioning garage door sensors!
There could also be something between the sensors blocking these signals. In some cases, sunlight or glare can block the sensors. Move any items blocking the sensors.
4. Broken Springs or Cables
Tension springs and cables help your garage door reach the ground smoothly. Therefore, the door can’t close properly if these components are damaged. If the door does close, it will likely crash to the ground and could cause damage to the door. The first sign of a broken spring is a malfunctioning garage door.
Broken springs or cables pose a serious risk to anyone in the garage. Call a garage door repair professional right away if you suspect faulty cables or springs.
5. Blocked Door Path
Dirt, pebbles, leaves and other debris can block your door’s path. Maybe your vehicle isn’t fully parked inside or you’ve placed an object too close to the door. Simply move any objects that may be blocking the door path. Small and large items can prevent your garage door from fully closing. Installing weather stripping can help prevent smaller debris from entering your garage and help keep your garage insulated.
6. Activated Disconnect Switch
The disconnect switch lets you open and close the door manually, such as during a power outage. Check if you forgot to disable the disconnect switch, which disengages your garage door and prevents it from moving.

Contact Cornwell Door Service for Garage Door Repairs
Are you dealing with a garage door that won’t close? Cornwell Door Service is a South Central Pennsylvania garage door repair company. As a one-stop shop for all your garage door needs, including installation, repair and maintenance, we can help you diagnose the problem and get your garage door up and running again. Schedule a repair service online or call us at 800-820-9841 today!
How to Fix Garage Door Gaps
Gaps in your door can let unwanted things into your garage, from noise to pests and debris. Cracks can form in the seals at the top, bottom and sides of your garage door, and they might not always be visible.
Fortunately, you can take some steps to seal garage door gaps on your own — and you can always turn to the professionals at Cornwell Door Service for assistance. Our family-owned company offers comprehensive garage door services to homeowners and businesses in Camp Hill, Lebanon, Harrisburg and throughout south central Pennsylvania.
What Causes Garage Door Gaps?
Garage door gaps can occur for various reasons, including wear, improper installation and weather changes. Gaps create a security risk by making your door less efficient in preventing break-ins. Openings also expose your garage, vehicles and belongings to heat, dust, debris and moisture. Sealing garage gaps enhances protection and can decrease your energy bills by improving insulation.
If you see any gaps or suspect your previous garage door company didn’t install your door properly, our experienced technicians will gladly come and inspect. We offer professional recommendations and services to ensure your door is secure and in top condition.
Finding Gaps in Your Garage Door
Identifying garage door gaps is the first step in adjusting them. Significant gaps are more visible, especially at the bottom of your garage door. Small cracks and those at the top and sides of your door can be more challenging to spot. Your garage door may have a hidden gap if you notice:
- Pests in the garage: Pests like mice and insects will often enter your garage through cracks in the door. Once they make a home inside, they can damage any belongings you have in storage. If you have an attached garage, pests may even find an entry point to the rest of your home.
- Wind and water inflow: Gaps in your garage door can let the elements inside. Moisture from rain and snow may reach your storage area and damage the structure of your garage over time. Wind in your garage can decrease the temperature and increase your utility bills, especially during winter.
- Increased noise from outside: Sounds from the street can also leak in through gaps in your garage door. You might not notice or mind if you only use your garage for parking or storage, but excess sound can be distracting if your garage functions as a workspace.
How to Fix Garage Door Gaps on the Sides
If you’ve noticed a gap in your garage door on the side, it may stem from an issue with the stops. You can find these rubber trimmings along the length of your garage door, and you may need to replace them occasionally. As a short-term fix, you could fill in any small cracks in the garage door stops with caulk.
Bent or misaligned tracks also lead to gaps in the side of garage doors. If the tracks aren’t parallel, it’s best to find a garage door technician to realign them safely and adjust the garage door gap.
How to Fix Gaps Under Your Garage Door
If you notice gaps at the bottom of your garage door, worn weatherstripping is a likely cause. Garage door weatherstripping often wears down on its own over time. It’s also a frequent target for mice and other pests to chew.
You can call a professional to install new weatherstripping or visit your local hardware store to find a kit to install garage door weatherstripping yourself. If you opt to install your own weatherstripping, it’s a good idea to measure the bottom of your garage door at least twice to ensure the product will fit. Then, cut the weatherstripping to the length of your garage door and install it per the instructions in the kit.
A bottom gap may also indicate that your garage frame has settled. Another possibility is that the bottom door panel is sagging, indicating it might be time to replace the panel or the entire door.
How to Seal Gaps at the Top of a Garage Door
Like gaps on the sides of your garage door, gaps at the top could be the result of an issue with the stops. Track misalignment can also cause the door to reach the ground before the top of the door straightens out completely, resulting in a gap. It’s best to turn to an expert technician in this case.
Like gaps on the sides, garage door gaps at the top could be caused by an issue with the stops. Track misalignment can also cause the door to reach the ground before the top of the door straightens out completely, resulting in a gap. In this case, it’s best to turn to an expert technician.
Maintenance Tips for Garage Doors
The best tip for keeping your door in good condition and prolonging its life span is to invest in preventive garage door maintenance services. Regular inspections and seasonal maintenance can save costs over time by reducing the likelihood of major issues.
Here are some additional tips that either you or our technicians can do to increase the longevity of your door:
- Clean and paint the door to protect it from the elements.
- Clear tracks and tighten hardware for smooth operation.
- Lubricate all moving parts to reduce rust and corrosion.
- Replace weatherstripping to seal gaps and protect your garage interior.
- Schedule inspections to prevent costly repairs.
Your garage door is vital to your home’s security, and preventive maintenance is the best way to ensure your family and belongings are safely protected.
Contact Us for Your Garage Door Needs
If you’re not sure what’s causing the gap in your garage door, the experts at Cornwell Door Service are here for you. We’ll work to diagnose the issue and provide a long-term solution. Businesses and homeowners throughout Camp Hill, Harrisburg, Lebanon and other parts of Central Pennsylvania turn to Cornwell Door for everything from garage door installation to maintenance and repairs.
If you live in South Central Pennsylvania and need help fixing your garage door, we can help! We make it easy to request an estimate or schedule a service for your garage door online. You can also call us at 717-273-9841 to schedule a service or to learn more!
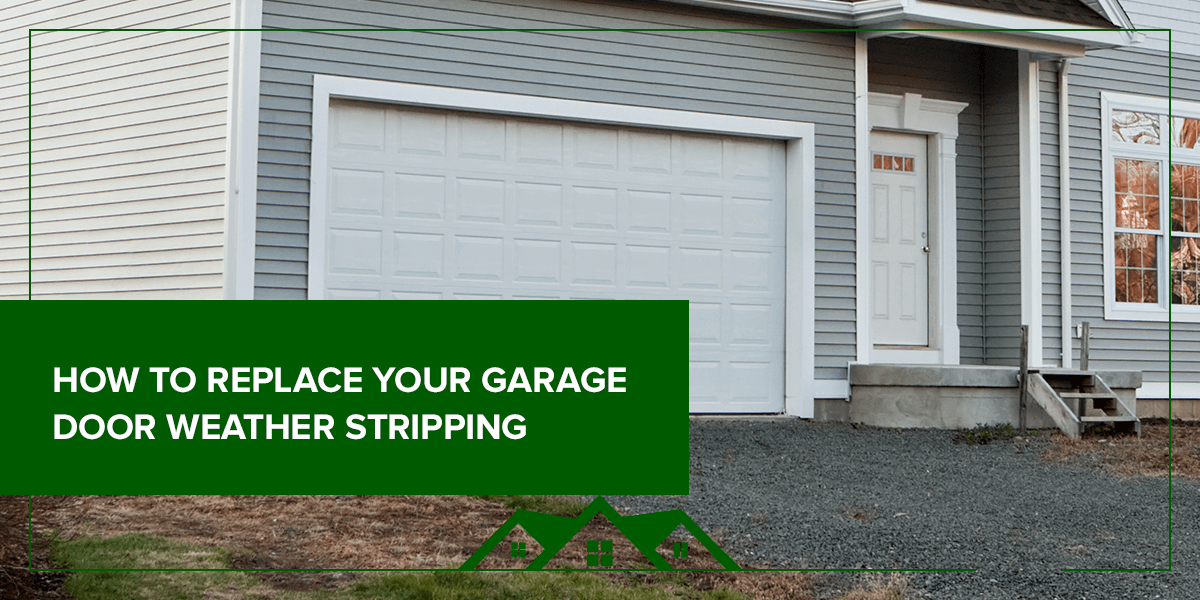
How to Replace Your Garage Door Weather Stripping
Having strong weather seals on your garage door is essential for defending your home against the elements. Over time, these seals can begin to break down, which could allow rain, snow or tiny critters to damage your home. Replacing these weather seals will give you the peace of mind and comfort you deserve.
Keep reading to learn how you can replace your garage door weather stripping in a few easy steps.
Benefits of Garage Door Weather Stripping
While your garage door weather seals safeguard your home and belongings from all sorts of weather conditions and animals, they’re also crucial for maintaining a consistent internal temperature. Sealing all cracks around your garage door will help create a comfortable space and decrease your utility bills.
Removing Garage Door Weather Stripping
To start your garage door weather stripping replacement job, you’ll have to remove your current seals from your garage door’s frame. This process is often straightforward and only requires a hammer, pry bar or flathead screwdriver.
Start by inserting your chosen tool beneath the edge of your current weather seals. Then, push the tool away from your body so that the end beneath the strip moves toward you, lifting the nail and strip with it. Doing this near each nail on the strip ensures a clean, damage-free removal. Once you have the first one off, you can repeat this same process for the rest of your seals.
Measuring and Cutting Your Garage Door Weather Stripping
Many weather strips will come in pre-cut sizes from your local store, commonly ranging from 7 to 9 feet long. You can find the exact size you need by measuring the length of your current weather seals with a tape measure.
If you want to save some time, lay your current weather seal on top of your new one and use a pencil to trace how much you’ll need to use on the new one. When you’re ready to cut, you can use a box knife or a hand saw to trim it down to the size you need. It’s wise to cut your side pieces about 1/4-inch shorter than your garage height to prevent them from touching the ground, which could make them collect water and possibly rot.
Installing Your Top Garage Door Weather Seal
You should attach the top weather seal to your garage door frame first. With your door closed, ensure your weather sealing is flush and firmly pressed against the door and fasten it using nails or screws. You can tap the nails halfway in to give yourself some wiggle room if things need to be adjusted.
Installing Your New Weather Seals on the Sides
Once you attach your top weather seal to your garage door, push the ends of the side seal up to the corner. Ensure it is touching the top strip and not resting on the ground. Pressing firmly against the door, secure the seal with nails that are halfway in and do the same with the other side.
Once everything is in its correct place, try opening and closing your garage door to ensure it runs well. After making any adjustments, you can nail the seals in place fully. Now enjoy keeping your garage secure and your home energy efficient!
Replace Your Garage Door Weather Stripping With Cornwell Door Service
Whether you’re missing a weather strip on your garage door or you want to update your current seal, Cornwell Door is ready to help. We have been operating since 1972 and provide garage door services to homeowners across South Central Pennsylvania. If you have any questions about weather sealing your garage door, we’re happy to help.
Do you live in the South Central Pennsylvania region? We are happy to install weather stripping or perform any garage door services for you. Call us at 717-273-9841 or schedule an appointment online today!
Winter-Proofing Your Garage
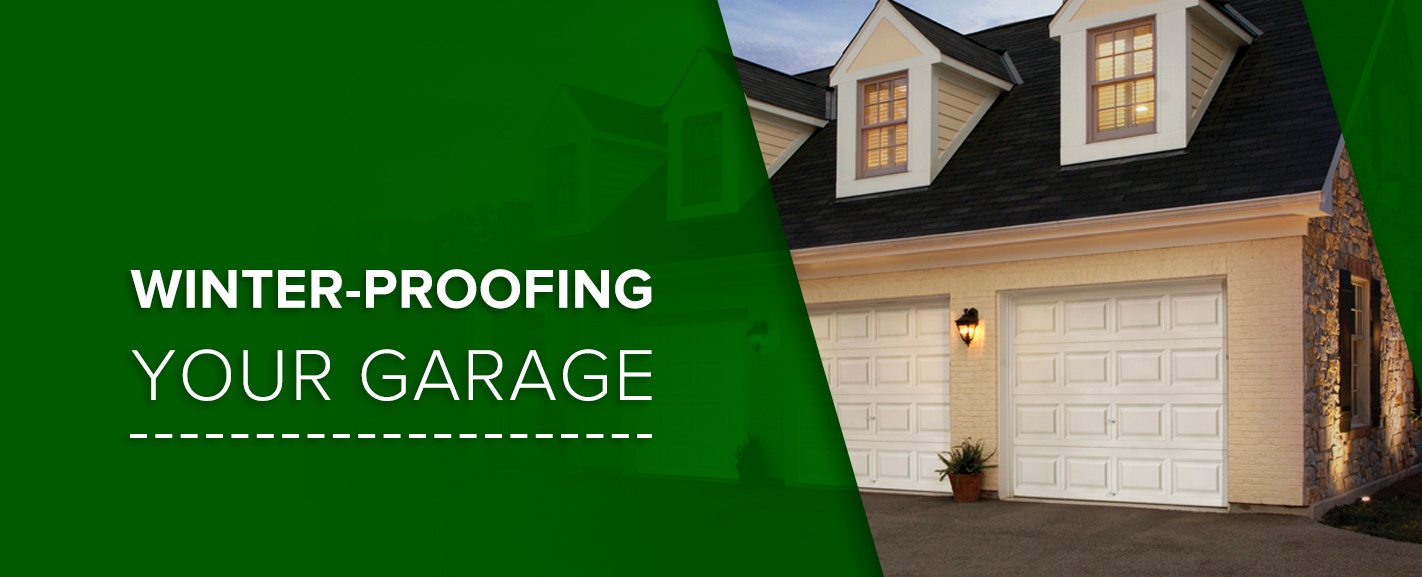
When winter approaches, homeowners perform a variety of tasks to prepare their homes for the upcoming cold, ice and snow. These include cleaning gutters, winterizing lawns and, perhaps most importantly, winter-proofing the garage. Winter-proofing, which involves replacing weather stripping and adding insulation, makes a garage more comfortable and protects it from moisture damage during the coldest months of the year.
In this guide, we go over the many benefits of winter-proofing a garage and provide tips on how to perform these tasks efficiently.
How to Winter-Proof Your Garage for Winter
Follow these five steps to help you learn how to winterize your garage door for the cold months ahead:
1. Clean Your Garage
Before you start winter-proofing the garage, you first must clean it thoroughly. Sweep away debris, dirt, leaves, mulch and bugs. Then, clean your walls, removing all dirt, dust and cobwebs.
2. Install New Weatherstripping
Once you’ve thoroughly cleaned your garage, you can start the winterization process, beginning with the insulation. When you hear the word “insulation,” you may think of that fluffy pink stuff found in your walls, but insulation can also refer to sealing any leaks that may be allowing warm air out during the winter.
For this reason, before you deal with actual insulation, it is recommended that you examine the weatherstripping found on all your garage’s doors and windows — including the garage door itself. If you notice any broken or cracked areas, fix or replace them.
Weatherstripping crack holes become brittle with time, which may result in air leaks and cold drafts. If you’ve felt any drafts caused by cracked weatherstripping, you will want to take out the weatherstripping, scrape away any sealant that remains, then apply the new weatherstripping to your garage door. This is an essential aspect of how to insulate your garage door for winter.
If you need to replace the weatherstripping for the garage door, make sure that you correctly measure and align the new weatherstripping so that it forms a secure, reliable seal. To do this, close the door and align your weatherstripping so that the rubber flap gets flattened against your garage door. To know if you properly sealed your garage door for winter and cold weather, you can test by checking if any cold air gets through where you applied weatherstripping.
3. Add Wall Insulation
After sealing all of the air leaks, you can start adding your garage insulation in your walls, which will serve as one of your garage’s protective barriers. It’s recommended that you use fiberglass bat insulation with a thickness that matches that of your walls.
4. Insulate Your Garage Door
Even though you’ve already updated your garage door’s weatherstripping, if it’s not insulated, there’s a chance you’ll lose a lot of heat through it. To make sure your garage stays toasty during the cold season, you should insulate your garage door as well. To do this, you can buy a wide variety of kits, including options like fiberglass, reflective barriers and foam boards.
When you insulate your garage door, cut the insulation with care so it fits inside the panels of the door. Then, secure each piece using an adhesive. If your garage still feels cold after the installation is complete, you may want to replace your current door with a newer, more insulated model.
5. Install a Heater
The last step in winter-proofing is installing a reliable garage heater. Although weatherstripping and insulation are great at preventing cold weather from getting inside, they don’t really help to warm up the room. For that, you’ll need a reliable unit heater, which is affordable to install and doesn’t take up much space.
Fill out a contact form or give us a call at (800) 820-9841 if you want help making your garage warmer in the winter.
Why Should I Winter-Proof My Garage Door?
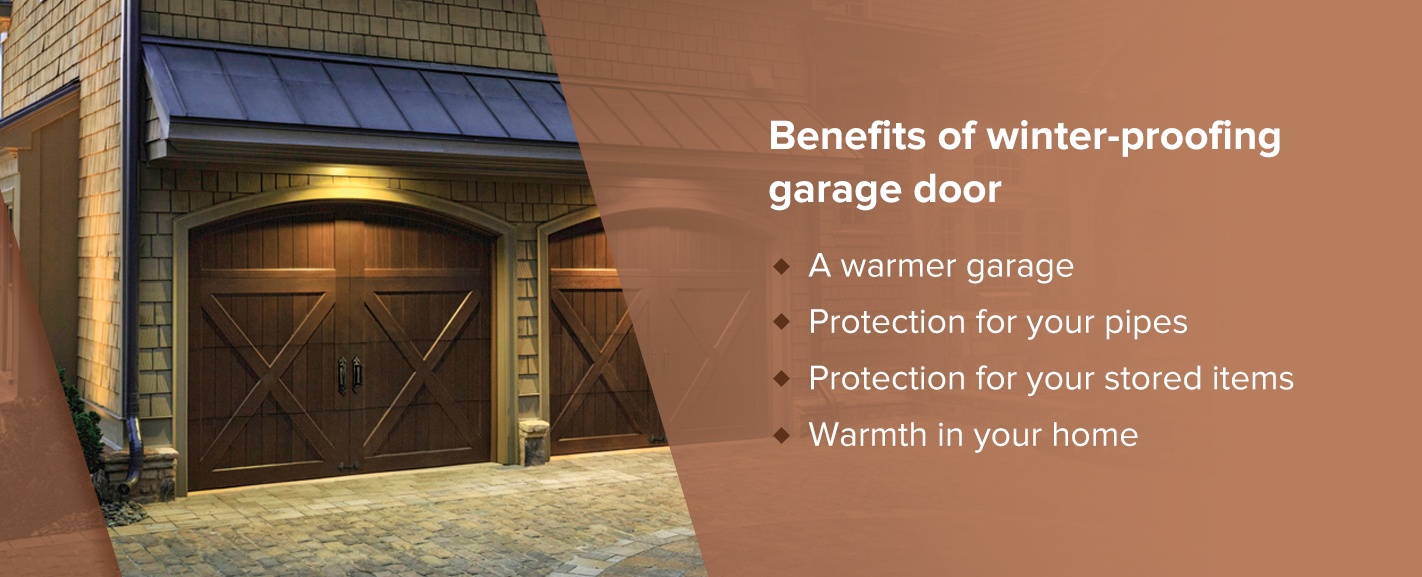
If you’re not sure you whether winter-proofing your garage is worth the time and effort, consider the following benefits:
- A warmer garage: If you spend even a little time in the garage during the winter months, you’ll greatly appreciate the warmer temperatures that winter-proofing will bring you. Even if you only use your garage to walk between the car and the entrance to your home, you’ll find the walk much more pleasant. A warmer garage means that your car will warm up more quickly as well.
- Protection for your garage pipes: If you have water pipes that run through the garage, then keeping this area warm is critical for preventing burst pipes, which can have disastrous consequences for your plumbing. Averting this damage will save you money, time and stress.
- Protection for your stored items: Many homeowners use their garages for storage. By winter-proofing your garage, you will be protecting these items from exposure to water moisture and extreme cold.
- Warmth in your home: If your garage is warmer, that means the interior of your home will be warmer, as well, especially rooms that are adjacent to the garage. Likewise, if you choose not to insulate your garage, the cold air in your garage will seep through to adjoining rooms, making the rest of your home colder. To deal with this increased cold, you’ll have to turn the heat up, which will mean higher energy bills.
Should I Insulate My Garage Door?
Depending on the location and type of garage you have, insulating your garage door can be hugely beneficial. While you often get more benefit from insulating doors in attached garages, detached garages can also benefit from insulation, especially in regions with extreme weather. Here are three benefits of insulating your door:
- Improved energy efficiency: A garage door that is insulated prevents heat from escaping during the winter months and keeps warm air from coming in during the summer months. By keeping the temperature in your garage moderate, less energy will be required to cool and heat your house, meaning lower energy costs. If your garage is attached, having an insulated door can help prevent unwanted cold or hot air from seeping into other parts of the house.
- Stronger door: A garage door with insulation is stronger than one without. It can better withstand constant use and dents from toys, weather and vehicles. It is also better able to resist rusting that often occurs with single-layer, non-insulated doors. Insulated garage doors today are generally made using steel frames in which solid insulation is inserted, which makes them both lightweight and sturdy. They’re designed to last a long time and be resistant to sun, heat, wind and other harsh elements.
- Less noise: An insulated garage door operates more quietly than a non-insulated one because its strength means fewer rattles and creaks. Quieter operation is particularly important if your garage is next to or below a living area.
How to Prevent Common Winter Garage Door Problems
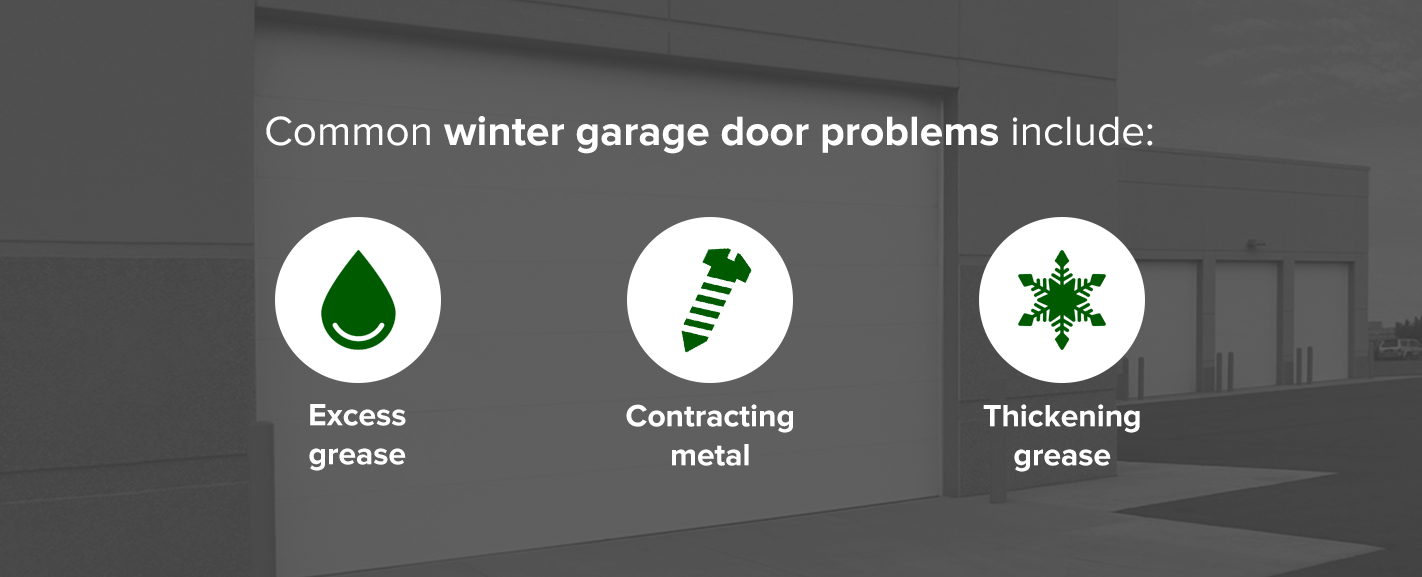
When temperatures drop, garage doors are more likely to malfunction, which means you won’t be able to pull your vehicle safely inside. Being aware of the issues you might experience and knowing how to prevent them will help you ensure you can get back into your cozy, warm home quickly. Some common winter garage door problems include:
- Excess grease: Although this issue can happen at any time of year, winter is when it can become a serious problem. Excessive lubrication could cause the rollers to become misaligned, meaning the door will have trouble opening and closing smoothly. To avoid this problem, you must determine the ideal amount of lubrication for your door.
- Contracting metal: Some materials tend to contract when the temperature falls below a certain threshold. One such material is metal, which the screws, springs and many other garage door components are made of. All of these parts are known to shrink when it gets cold outside, and while you can’t prevent this from happening, you can reduce its effects if you add more lubricant. Lubricate the springs, screw drive and torsion ball bearings with a good amount of garage door oil. However, make sure the oil stays off the tracks to avoid the misalignment issue mentioned above.
- Thickening grease: While lubricating greases can generally operate well in extremely high temperatures, they don’t always perform so well in cold temperatures. Cold can cause grease to thicken, at which point it is no longer an effective lubricant. To prevent this situation, take off old hardened grease using an appropriate solvent and apply a silicone-based oil, which will perform better in cold temperatures.
Reach Out to Speak With Our Garage Door Experts
Cornwell Door Service is a Lebanon, Pennsylvania-based overhead door company that has set unparalleled standards of excellence in the industry for over four decades. To schedule a service, please use our online form or call us at 800-820-9841 for more information.
Seasonal Garage Door Preparation
Most homeowners use their garage doors every day to safely and easily leave and enter their homes, but temperature changes and extreme weather conditions can affect the overall quality of your hardware and the functionality of the system. These system failures can potentially cause property damages, hazardous conditions or leave you without the safe, convenient use of your garage door.
With proper garage door seasonal maintenance, you can prolong the lifespan of your garage door system, improve garage door operations and prevent costly and inconvenient emergency repair needs.
Preparing Your Garage Door for Winter
In many locations, winter can be one of the worst seasons for your home, including your garage door and opener, due to frigid temperatures, excess moisture and heavy winds. To keep your garage door in proper condition and operating smoothly during the winter months, it’s crucial to perform garage door seasonal maintenance.
Neglected garage doors can experience regular hardware failures and breakages or place additional strain on your garage door opener. This can lead to your garage door refusing to open or close, leaving you stranded either outside your garage or trapped inside during cold days or inclement weather conditions.
Avoid unfortunate and inconvenient garage door issues by properly preparing your garage door for winter with these simple maintenance tasks:
- Observe Door Operations: Any time you command your garage door to raise or lower, note any unusual performance issues like jerky movement or hesitation. Also, pay attention to any loud, odd noises coming from your garage door system or opener. Common sounds that indicate an issue with your system include grinding, scraping, screeching or grating.
- Inspect and Tighten Hardware: Average homeowners use their garage doors more than 1500 times per year, and with constant movement and vibration, several pieces of hardware can become loose over time. To avoid performance issues or hazardous instances, look over all your garage door parts and tighten any items that have loosened. At this time, you should also inspect several crucial pieces of hardware that affect the operations of your garage door — the springs, cables and rollers. Check your springs for signs of corrosion or weakened tension, make sure the cables aren’t worn or fraying and look at the quality of your rollers, noting any chips or cracked pieces. If you see damaged parts, call your local garage door repair company to inspect your system and make repairs.
- Test Garage Door Balance: A door off-balance can become off-track leading to safety issues and potential property damages. To test your door balance, release your door from the opener and manually lift it about halfway on its track. If the door stays in place, then your door is balanced correctly. If it sags and closes or quickly flies open, then it is off-balance. Have a professional garage repair company inspect it right away.
- Replace Weatherstripping: The black, rubber weatherstripping on the bottom of your garage door keeps your space insulated and protects your door from air transference and excess moisture penetration. If your weatherstripping is cracked, brittle or damaged, then replace this part to ensure optimal garage door efficiency.
- Regularly Lubricate Parts: Keeping your door’s moving parts well-lubricated will extend the lifespan of your hardware, prevent damages and ensure smooth, regular functionality. Consult your local garage door experts to find a spray lubricant that’s suitable for your garage door system, then apply a new coating to the appropriate parts, including the springs.
- Clear Debris and Dirt Buildup: Make sure your garage door can properly move up and down by clearing the garage door tracks of any dirt and debris buildup. Also, keep your safety features working as needed by wiping away any buildup on your photo eye sensor lenses — these black boxes at the base of your garage door signal to raise the garage door if it detects an object in the path of the closing door.
- Keep Garage Door Finish Pristine: Not only will a clean and maintained garage door improve your curb appeal, but it’ll also affect the quality and performance of the door. Make sure wood garage doors aren’t cracked, damaged or warped and check that steel and aluminum garage doors don’t have worn finishes and rust. If your steel door does show signs of corrosion, sand away the rust, prime the area and repaint that section to prevent additional damage.

Garage Door Seasonal Maintenance Tips
Due to opposite temperature extremes, you should apply many of your garage door winterization preparation to your garage door summer maintenance tasks, too. Extreme heat, direct sun exposure and heavy summer storms can negatively impact the quality of your parts and hardware and diminish the finish of your door.
Before the summer months, test the balance and safety features of your door, like the photo eye sensors and auto-reversing mechanism. Look over your hardware, checking for signs of corrosion and tightening pieces as needed. Also, apply a fresh coat of lubrication to any moving parts to ensure they function smoothly.
If you live in an area with frequent tropical storms or hurricanes, ensure your garage door is adequately reinforced, checking for any holes or openings that would be vulnerable to intense storms. Damaged or weak garage doors in a hurricane can negatively affect your home’s internal pressure, causing severe structural damages to your home.
To revamp the look of your home and let your garage door positively stand out, wash your steel or aluminum garage door with mild dish detergent and water, removing the built-up dirt and grime that accumulated on the surface during the winter months. Then, brighten the look of your door by repairing and removing any rust buildup and apply a new coat of paint.
Schedule Regularly Preventative Maintenance Services
Along with performing regular maintenance tasks at the beginning of each season — especially before harsh times of the year like summer and winter — you should have a professional garage door technician perform preventative maintenance services at least once per year. With routine maintenance, you can ensure the safety of your door, extend the lifespan of your system and avoid costly emergency repairs.
During annual preventative maintenance, one of our technicians will inspect all moving parts on your door for signs of wear or corrosion, lubricate hardware, check weather seals and locking mechanisms, perform a UL 325 safety reverse test and look over keyless entry systems and other electrical components. As needed, we’ll make repair recommendations to improve the efficiency and functionality of your door.
Schedule Seasonal Maintenance & Garage Door Installation With Cornwell Door Service
Don’t avoid or prolong performing regular garage door maintenance tasks — learn more about how to prepare your garage for winter or schedule maintenance services with Cornwell Door Service.
We’re a family-owned and operated company with more than 40 years of experience installing, maintaining and repairing garage doors throughout South Central Pennsylvania, including the Harrisburg, Lebanon and Camp Hill communities. Our team of highly trained and experienced professionals can perform comprehensive annual maintenance services or recommend repairs that can add to the performance, ease and convenience of your day. We pride ourselves on providing affordable services and personalized door solutions, which is why we offer free service quotes and 24-hour emergency repairs.
Schedule garage door maintenance today by completing our online contact form or calling 800-820-9841 to speak with a team member.